
Make your own garden stepping stones with just a few supplies from your local hardware store. Great for Mother’s Day or Father’s Day gifts or your own garden décor. We’ve all seen those super cute garden stepping stones in magazines and at our local gardening stores. The prices aren’t so cute though. Here’s how you and your kids can make your own at a fraction of the cost.

PHOTO
When I was a little girl I LOVED making and decorating mud pies to serve at tea parties. I was so proud of my creations, but they didn’t last long. They always dissolved in the first rain. These creations, however, will be beautifying your garden for years to come.
Making Garden Stepping Stones
You and your children can make wonderful unique stepping stones to decorate your garden or walkway with easily obtainable supplies, some you may already have around the house.
Supplies
- old metal cake pans: I picked mine up from the Dollar Store, but you can usually find them for pennies at garage sales. Remember you won’t be using these for food.
- a gallon bucket or pail for mixing the cement in
- a small disposable tub (about the size a whipped cream container)
- a 1 inch paint brush
- one can of WD40
- bag of white Portland cement
- small bag of white sand
- a bottle of craft acrylic paint
- clean water
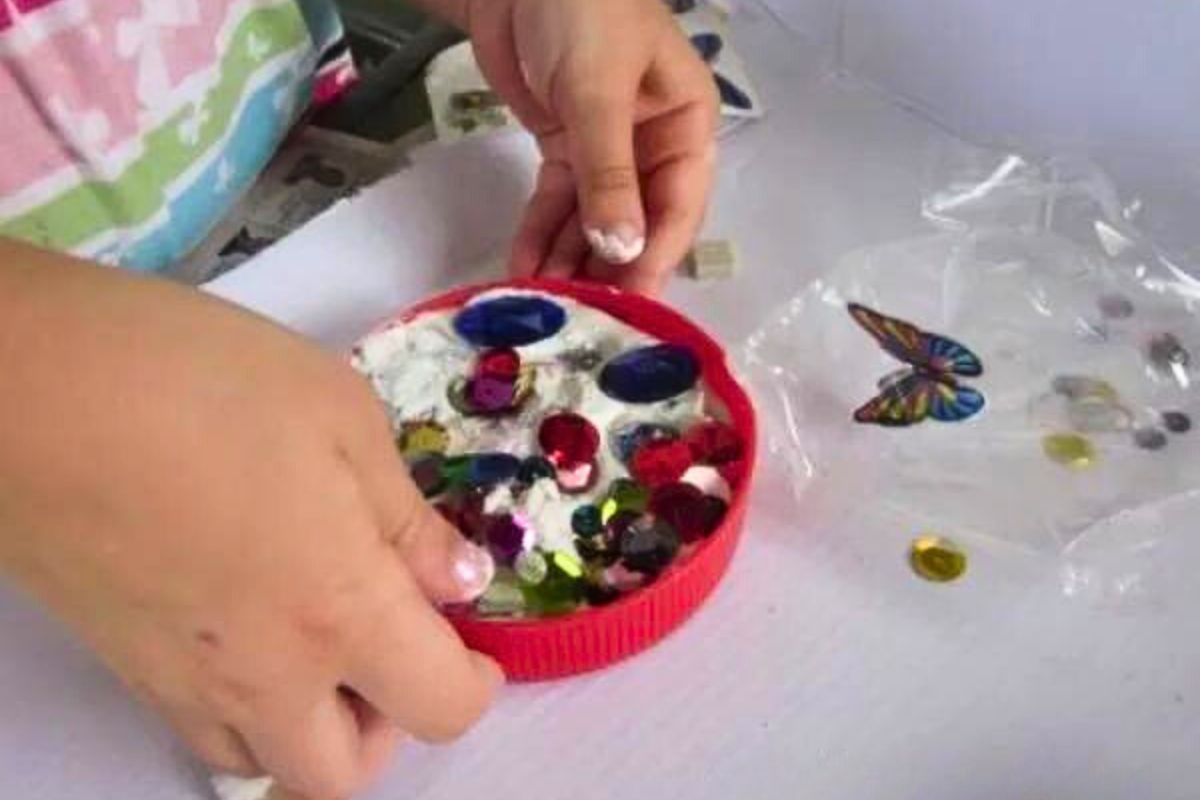
- an assortment of small tiles, pretty pebbles, flat glass marbles, shells, acrylic gems, coins etc to decorate your stepping stones
- toothpicks, chopsticks, dried up pens, pencil or craft sticks to carve with
- disposable latex gloves
Here’s How It Comes Together
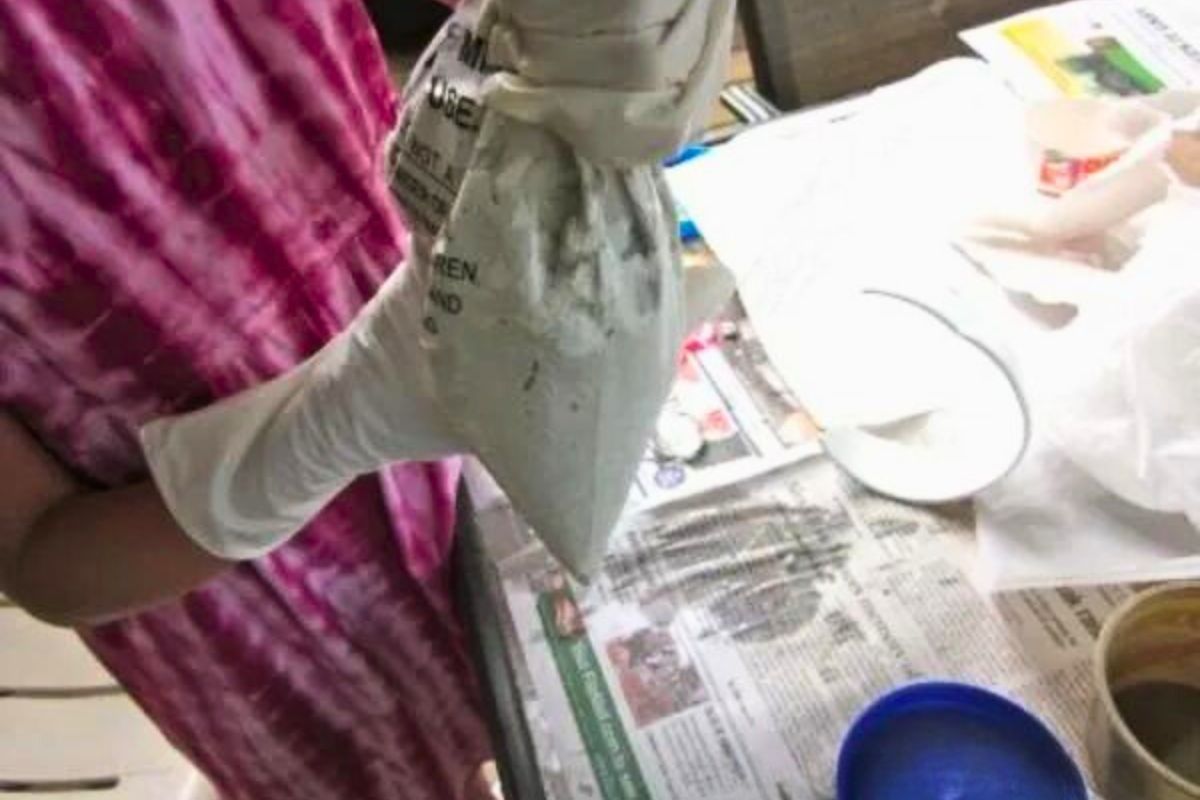
Be sure to put on the latex gloves while working with the cement and mortar. They are alkaline and will irritate the skin.
Spray pans with WD40 exactly as you would grease a pan to make a cake
Mix acrylic paint in a small amount of water. The color needs to be stronger than you really want the finished product to be because you will be mixing it into the white mortar.
- In the gallon bucket mix equal portions of white Portland cement and white sand. Add enough water to make the mixture hold together.
- In the small tub combine the white mortar mix with small amounts of the colored water until you have a slurry with cake batter consistency. You can add more paint if needed.
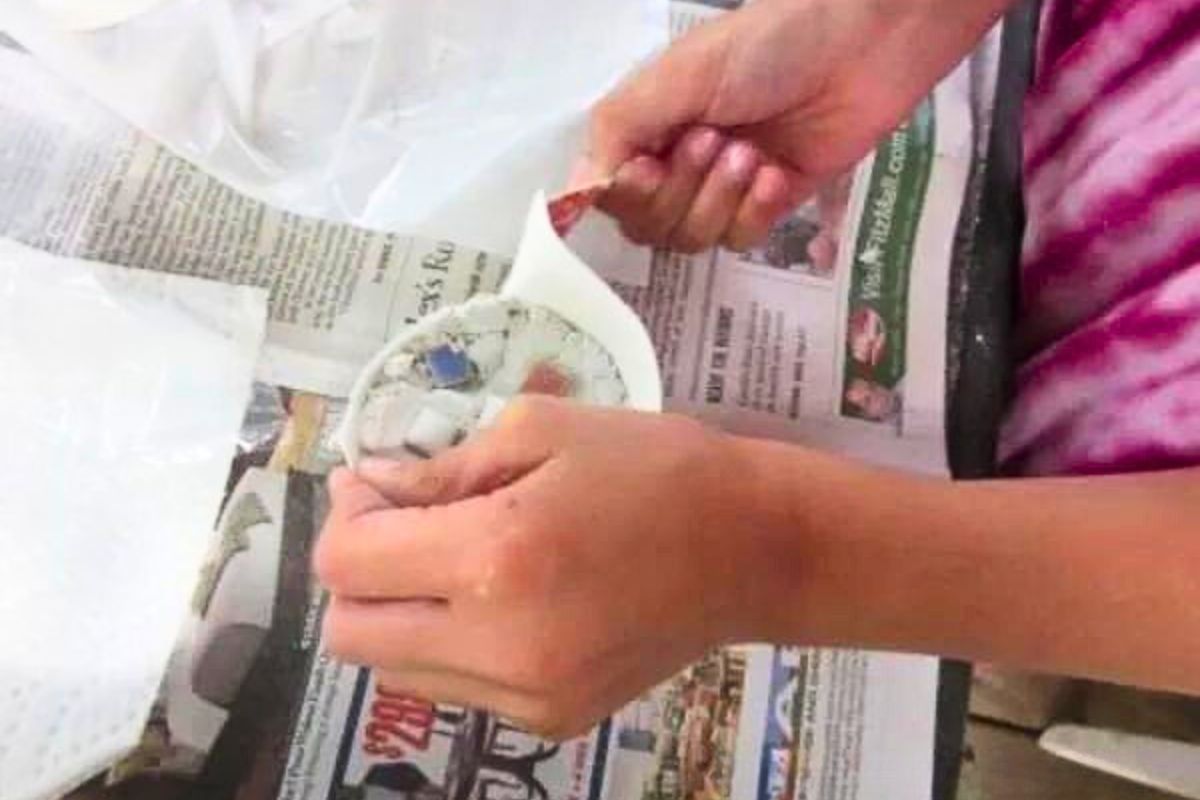
- Pack the cement mixture into the cake pans leaving about an inch at the top. Tap the pan firmly to help settle the cement and minimize bubbles. Pour the mortar mix on top of the cement and spread it around with the paintbrush to get even coverage.
- Use marbles, rocks, tiles and shells pushed into the mortar to decorate. Use the carving items to add words or details.
- Set aside to let dry.
- When completely dry turn your stepping stone out of the pan and get ready to decorate the garden!
FAQ
Do I have to use white cement and sand? All I can find is gray. Gray will work fine, but the paint you choose will need to be more intense hues and you will have shades or dusty tones of the color. If you want lighter colors, you could always order online!
What do I do if my child gets the cement or mortar on their skin? Wash it off with soap and lots of water.
7 comments
I, too, have looked at those expensive kits longingly… just knowing they would never make it into our cart. I think we may try this version of DIY, though. Thanks for the idea and the tips on using the concrete.
Alicia! Yes–this can totally be an inexpensive, do-it-yourself craft! Let me know how it goes–and one suggestion someone gave me was to create the stepping stones in metal pie tins. That may work even better!
Amy,
Next time, you may want to get those cute 6 or 8″ pizza boxes from the local pizza place and line them with plastic wrap. You can tape it down to the bottom, but it makes them a bit bigger and is usually really easy to get them out of the form and the plastic usually peels off! Just thought I’d add a little tip!
Robin–SO smart!! Yes, we’ll definitely try that for next time. . . I love that idea, my friend! Thank you!
[…] garden stones […]
[…] garden stones […]
[…] Garden Stepping Stones from Teach Mama […]