Teach Mama
  • Home
  • Recipes
  • Categories
  • About
  • Contact
  • Home 1
  • Home 2
  • Home 3
  • Main Dishes
  • Noodles
  • Breakfast
  • Vegetarians
Top Posts
Sight Word Game: Go Fish!
Write a Shape Book with your Pre-Reader
Every Day Summer Math Activities
Quick Father’s Day Surprise Love Notes
Sneaky Summer Reading Challenge
Hatch a Butterfly!
Father’s Day Gift Guide
How to Write a GREAT Thank You Note
Kindergarten Summer Reading Readiness
Teacher Gifts for the Last-Minute Parent
Teach Mama
  • Home
  • Recipes
  • Categories
  • About
  • Contact
  • Home 1
  • Home 2
  • Home 3
  • Main Dishes
  • Noodles
  • Breakfast
  • Vegetarians
Teach Mama
Teach Mama
  • About
  • Contact
  • disclaimer
  • terms of use
  • privacy policy
  • Site-Map
Copyright 2021 - All Right Reserved
Homemade bread with butter on a wooden cutting baord
sciencescience experiments for kids

Making Homemade Butter Like Our Ancestors Did

by Teach Mama September 29, 2024
written by Teach Mama

Looking for a way to give your kids an appreciation for how our ancestors did things before there were grocery stores full of fast and packaged foods? Making homemade butter is a great way to combine science and history that is also very tasty on fresh bread!

Loaf of homemade bread on a wooden cutting board with one buttered slice in front of it

We live thirty minutes from the nearest grocery store so when we needed butter we decided to see if we could make homemade butter faster than we could buy it!

Homemade Butter– Easy, Fun and Delicious

You may already have all the ingredients and tools to make delicious fresh homemade butter (almost) the same way your great great (great?) grandmother did!

Ingredients and Supplies You Will Need:

  • Heavy whipping cream
  • Sea salt
  • A one-quart mason jar or other jar with a tight screw on lid or a small butter churn
  • Ice in water in a large bowl
  • Slotted spatula or slotted spoon
  • Bowl for the finished butter

How to Make Butter

Way back in the day, the cream was skimmed off the top of milk fresh from the family cow and put into a wooden churn. Well, other than my homesteading friends, I don’t know too many people these days who have a milk cow in their backyard, HOA’s being what they are.

So we will be using heavy cream from the store right out of the carton instead. I also don’t know anyone with a real honest-to-goodness wooden churn so we’re going to substitute a jar. I do have a wonderful churn device which fits onto a mason jar. Using the churn is totally optional, but it is kind of fun.

Hand turning a small butter churn set on top of a mason jar
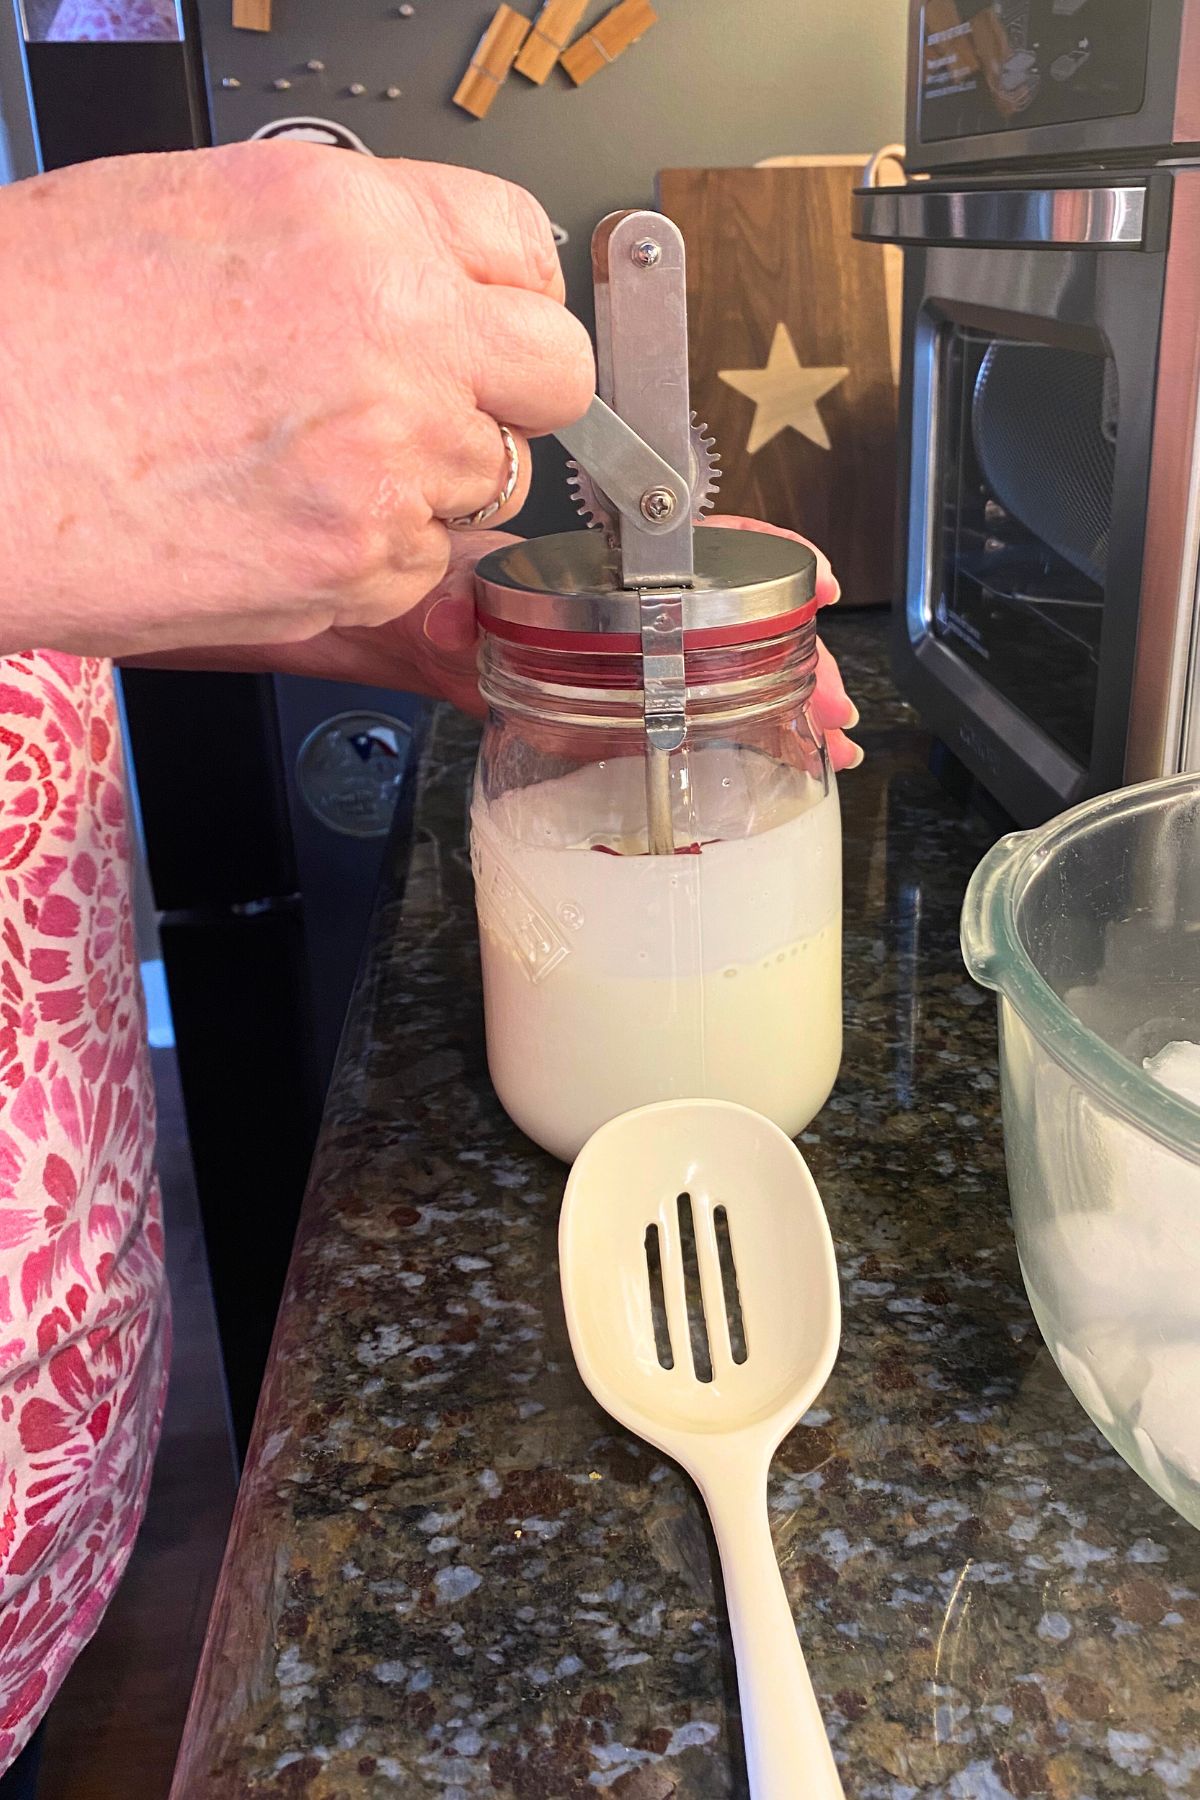
  • Fill the mason jar only about half full of the cream. This is so there is enough room for it to turn into first whipped cream and then lovely butter as your child shakes the jar or turns the crank.
  • Screw the lid on very tightly and start shaking or cranking. It will take about 15-20 minutes of energetic shaking or cranking for the butter to form. It will seem like nothing is happening and then there is a delightful thump when it suddenly turns into butter!
  • Drain off the liquid (the buttermilk … now you know why it’s called that!) You can drink it or use it in cooking.
  • Rinse the lump of butter in ice cold water and place in a bowl.
  • Add a pinch of salt and then use a slotted spatula or spoon to mash the butter. This helps release any extra buttermilk within the butter. If you leave it in it can cause the butter to go bad quickly. As fast as we eat it this has never been a problem, but if you aren’t going to eat it right away you need to be aware.
  • Rinse it one more time in ice water and store in a tightly sealed container in the refrigerator.
Freshly churned butter still in the glass jar

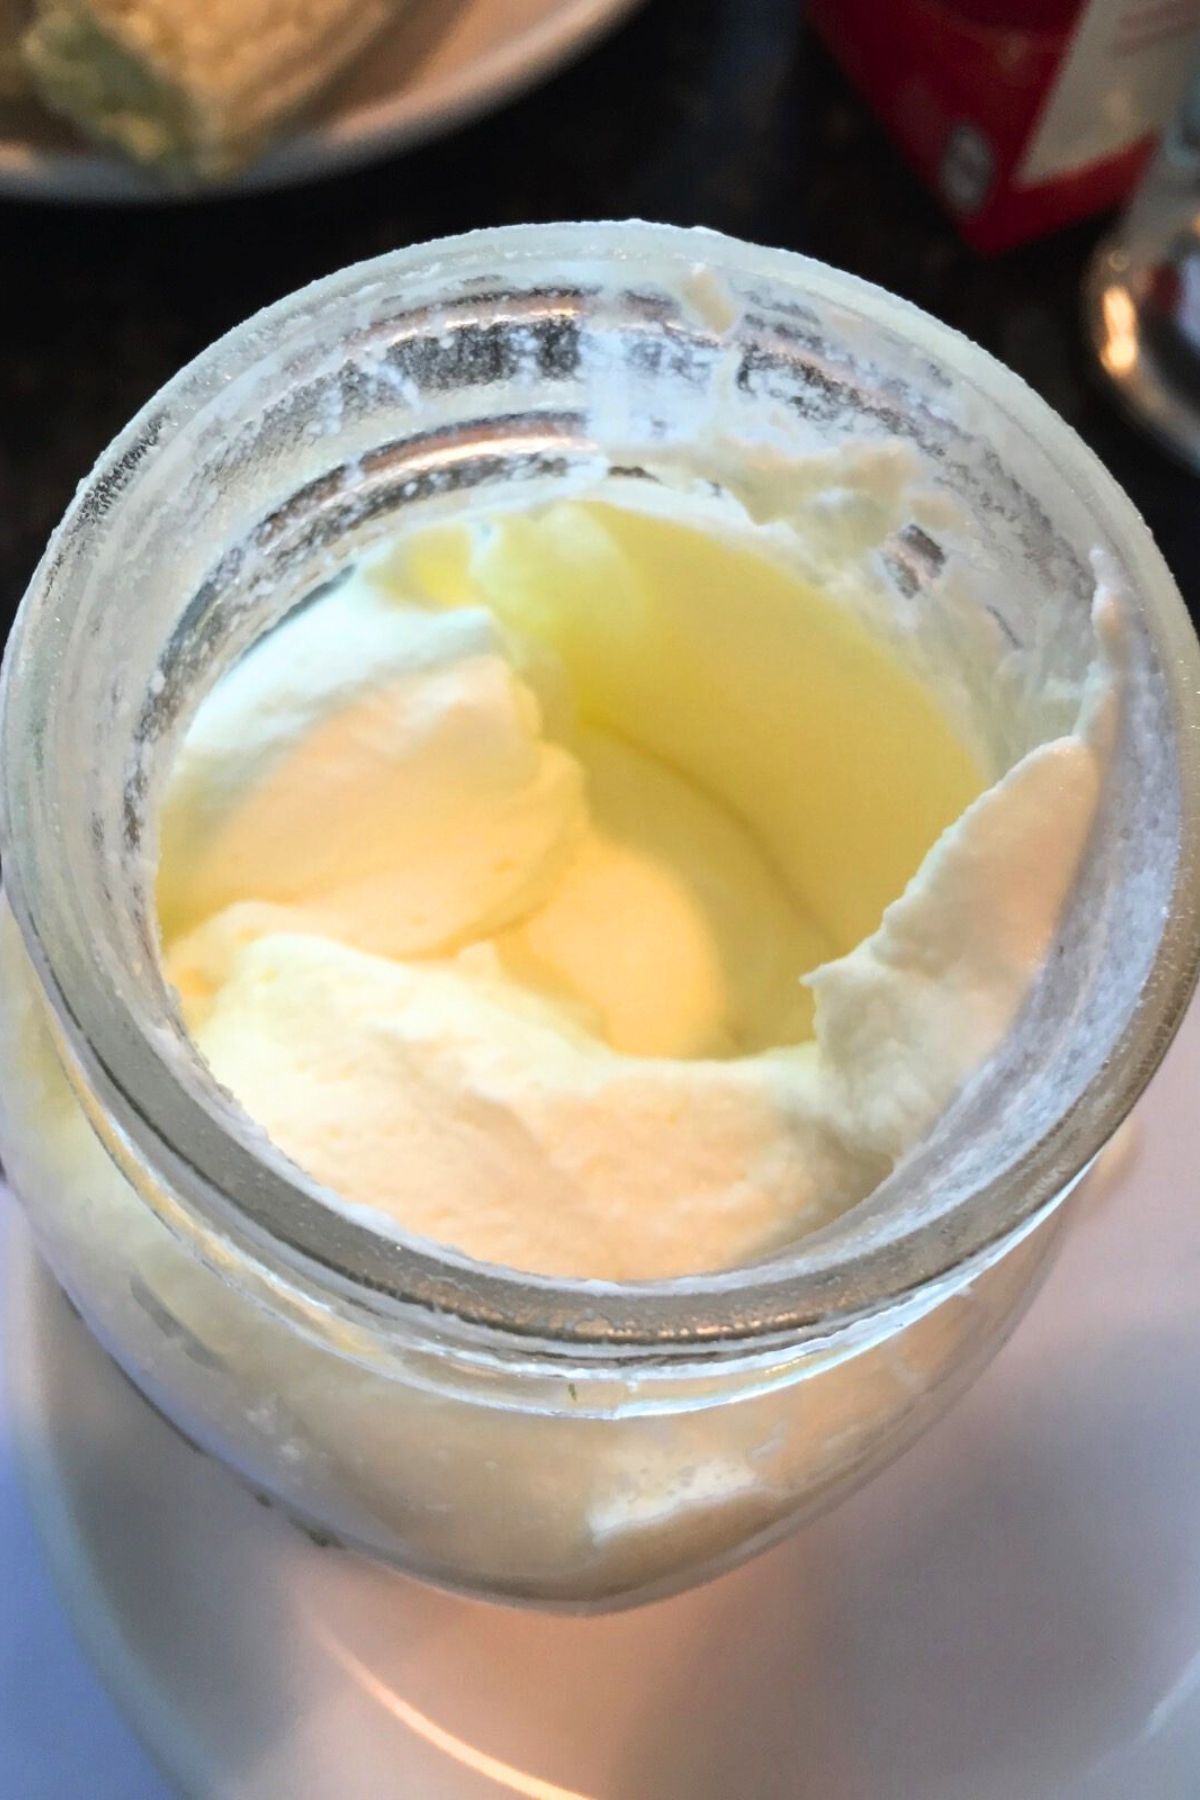
The first time I made this with kids they were upset the butter wasn’t the familiar yellow they were used to. My homesteader friends assure me that milk from the family cow who has been happily munching on good grasses will produce light yellow butter.

Seems like there is more beta-carotene stored in the milk fat than what is commercially produced today. I’m happy the bright yellow dye of my childhood isn’t used as much these days. (Artificial dyes in food is a soapbox for another time though!)

Finished butter on a glass plate

Want to grab a free printable instruction sheet for making your own sweet cream butter? Throw your email in the box below and the download will appear in your inbox:

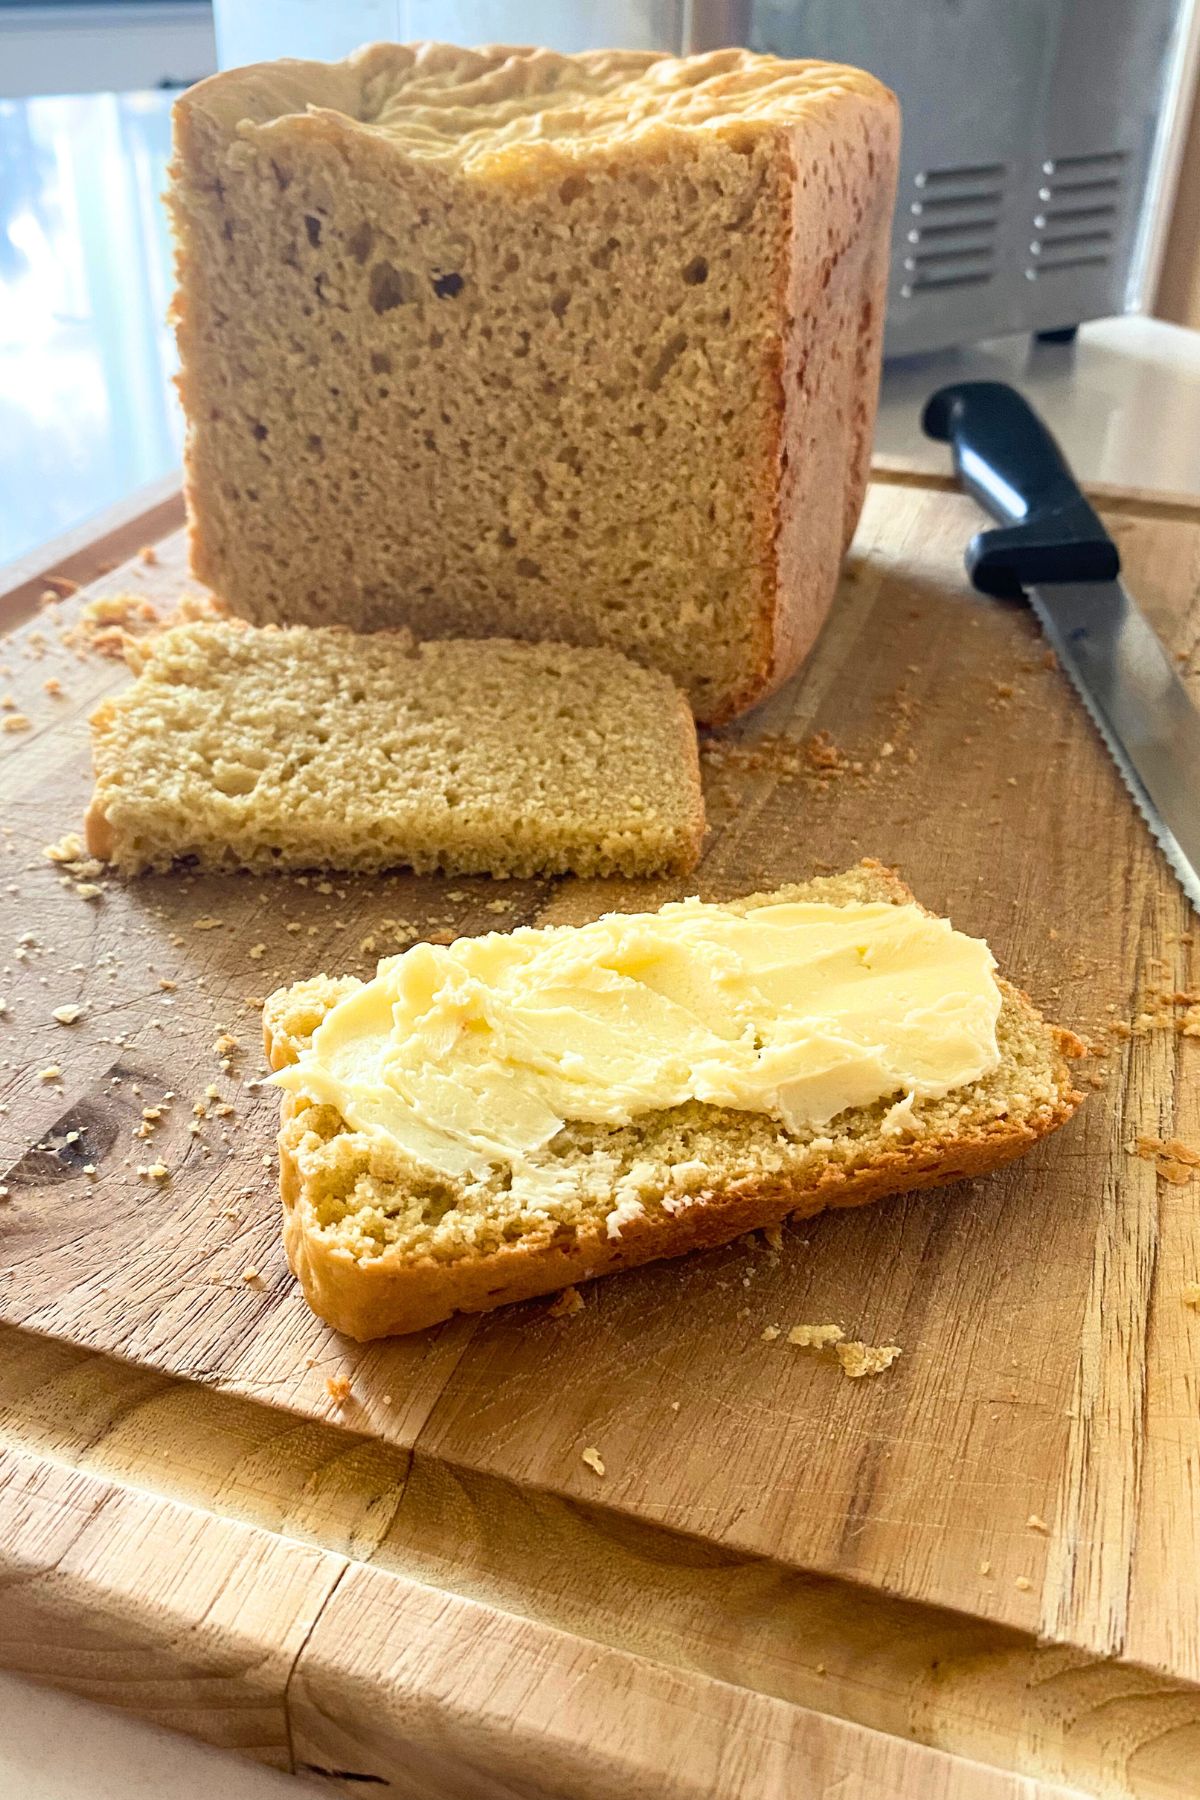
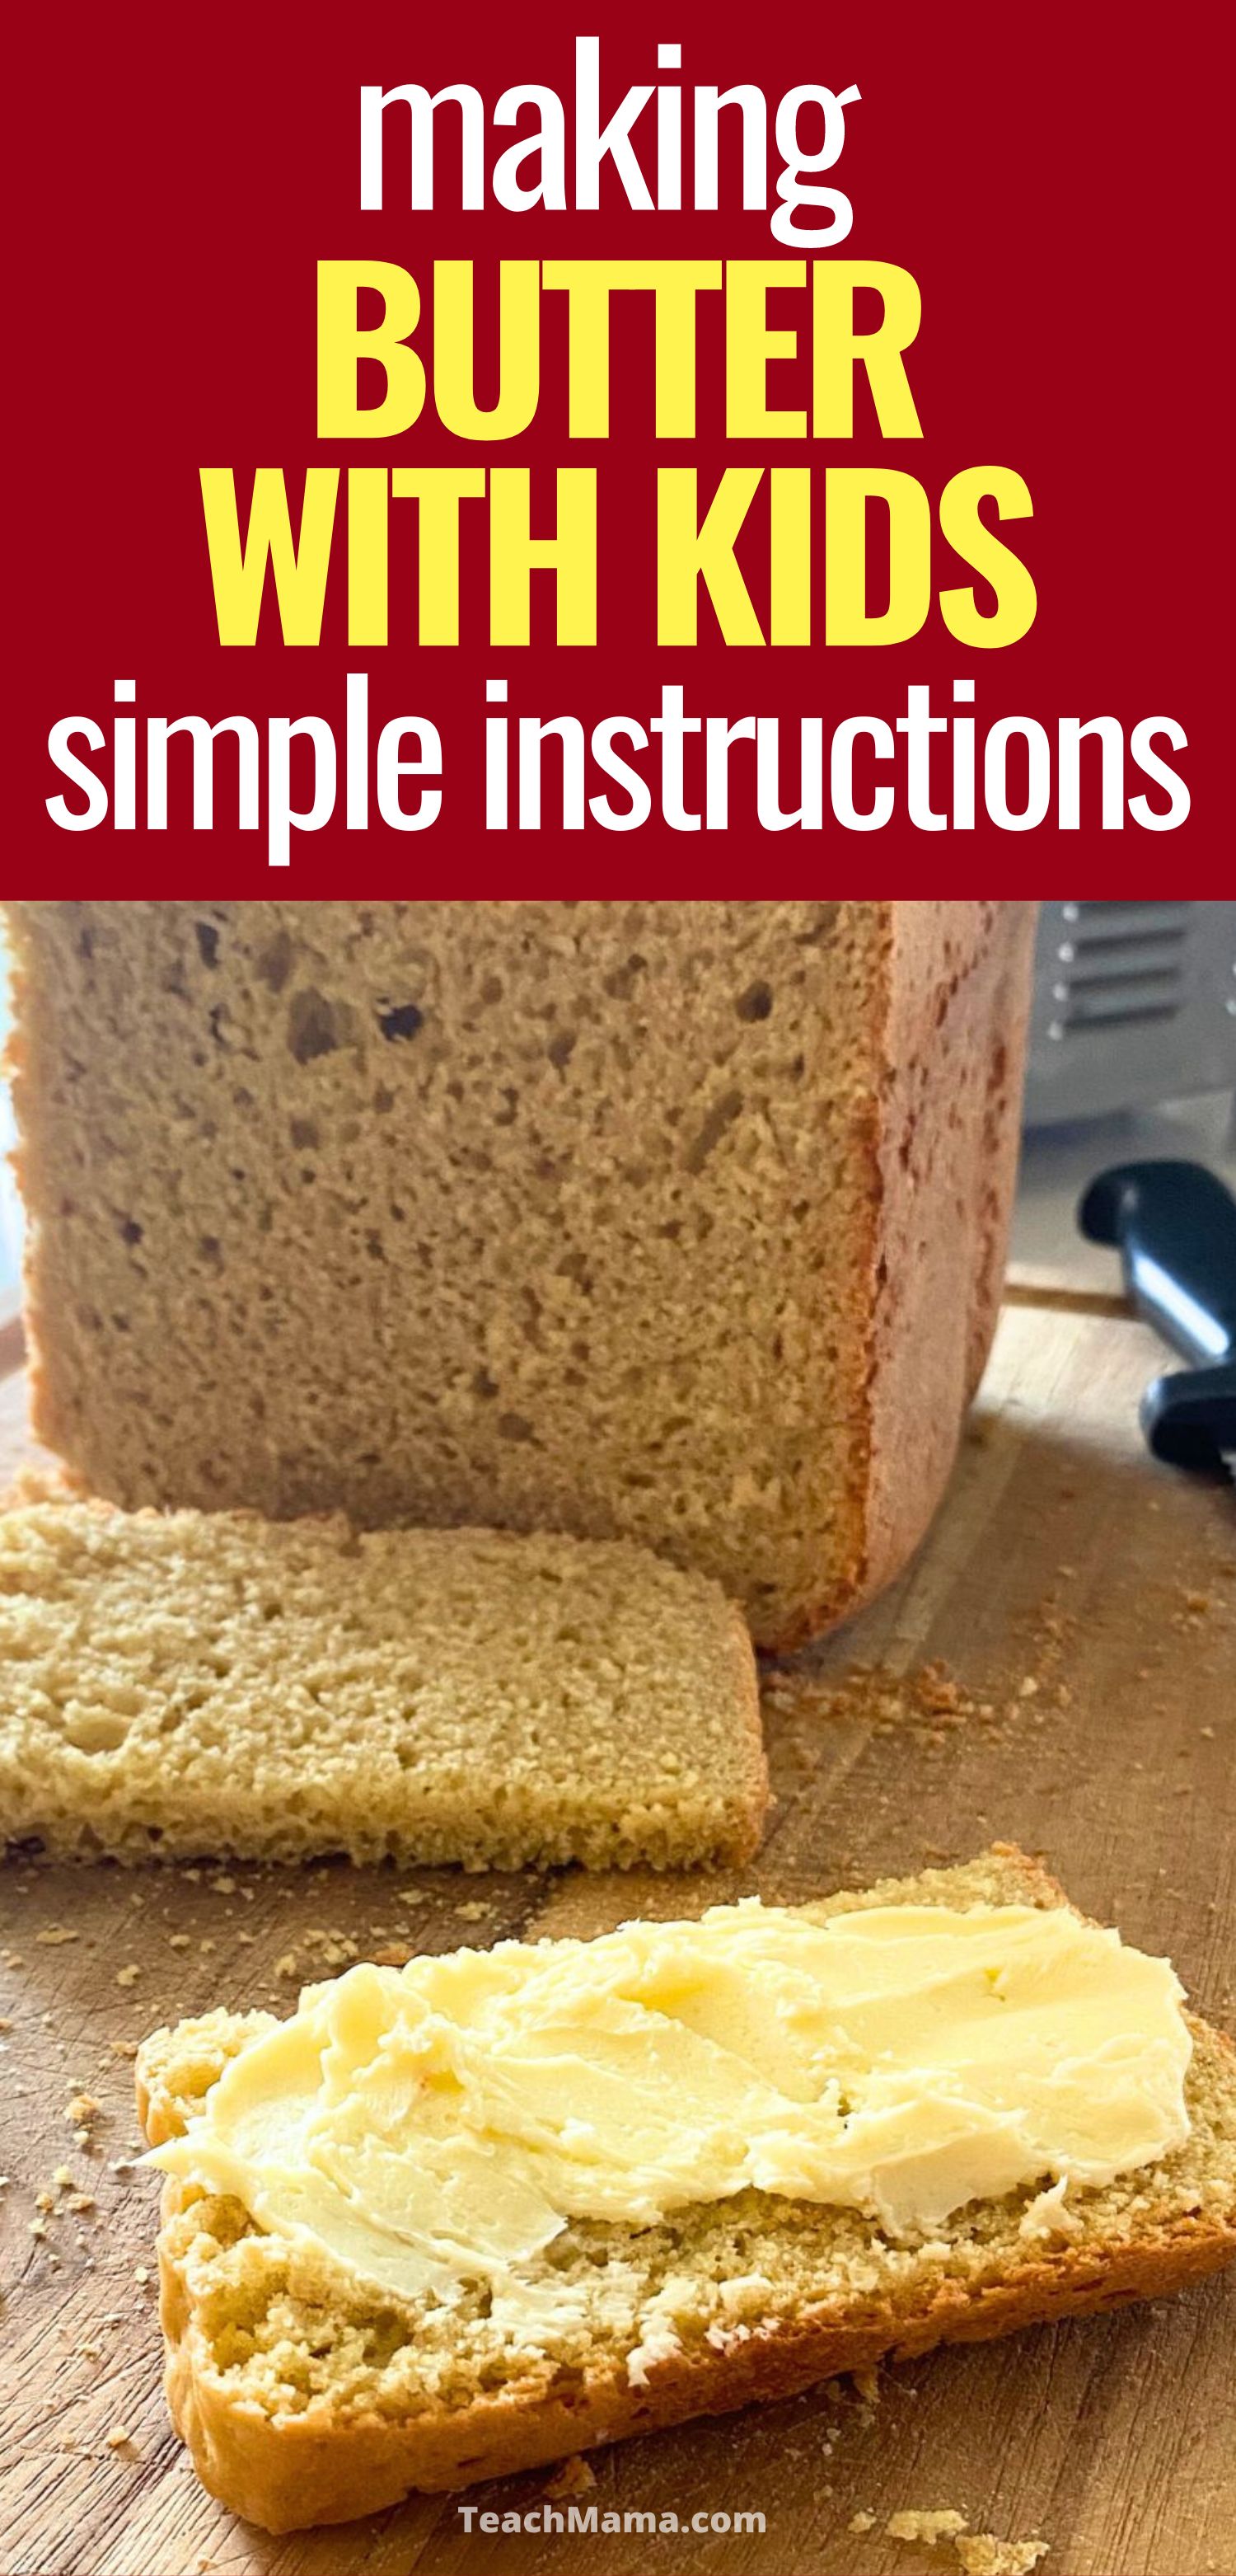
How about some great homemade bread to go with that fresh butter?

Here is a bread maker recipe from our friends at A Modern Homestead that works every time I use it…which is about once a week!

  • Great Bread Machine Bread

Looking for some other fun Fall activities? Check these out:

  • Thanksgiving Thankful Door
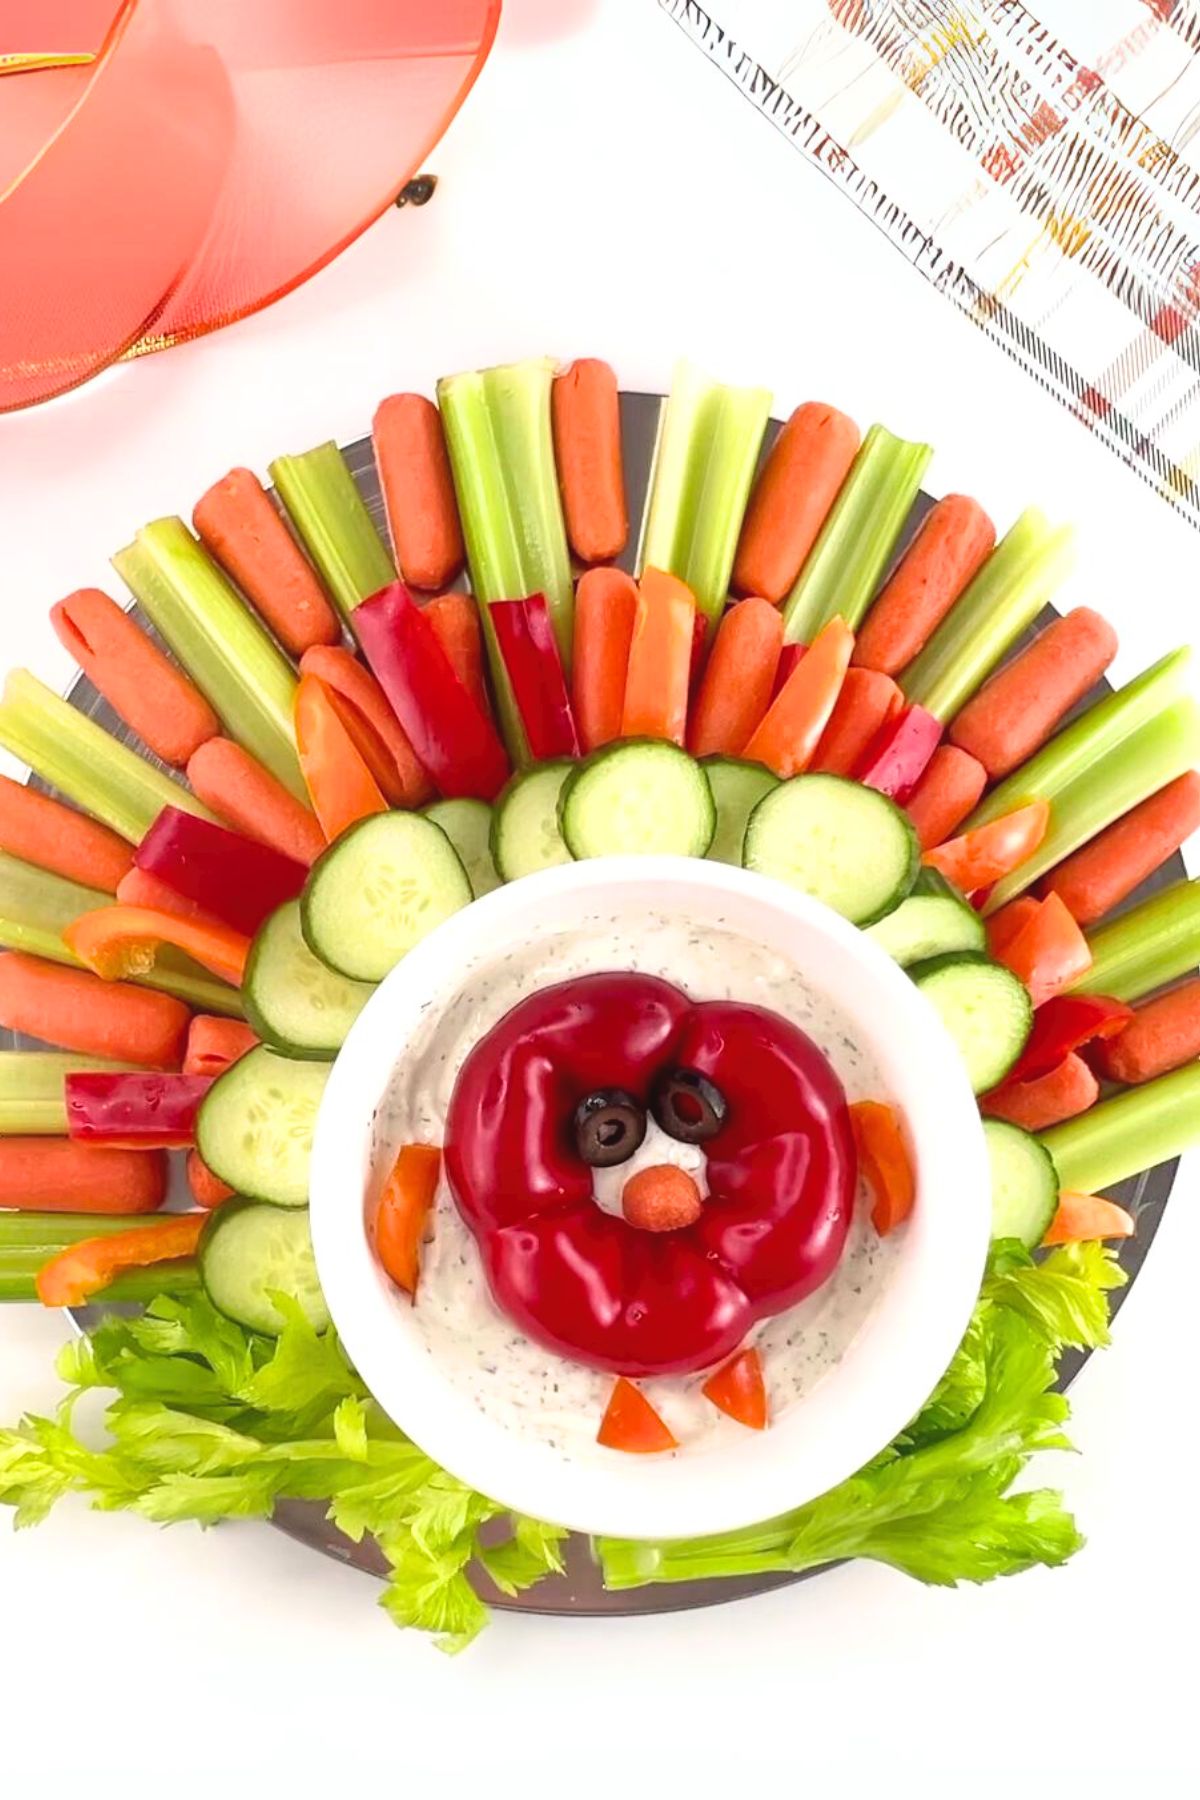
  • Make a Veggie Turkey Platter
  • Fall Owl Craft
  • Thanksgiving Printables for Kids
  • Our Favorite Cyber Monday Buys

PIN THIS FOR LATER

September 29, 2024 13 comments
0 FacebookTwitterPinterestPocketThreadsBlueskyEmail
Box of 64 crayons with a few crayons laying in front of it on a wooden table
beginning soundscolorsearly literacyword buildingwriting

Teach Early Reader Skills with Crayons!

by Teach Mama September 29, 2024
written by Teach Mama

Learning to read is one of the most important milestones in a child’s life, and as parents or educators, we want to make that process as engaging and enjoyable as possible. One of the simplest yet most effective tools you can use to teach early reader skills is something you likely already have at home—crayons!

Box of 64 crayons with a few crayons laying in front of it on a wooden table

Crayons aren’t just for coloring; they can be a powerful resource for teaching reading skills in a fun, hands-on way. In this post, I’ll share how you can use crayons to enhance your child’s reading journey, drawing from my own experiences as a homeschool mom.

Using Crayons to Help Teach Reading Skills to Early Readers

Why Crayons Are Perfect for Early Readers

Crayons are more than just colorful sticks of wax. They are tactile, easy to hold, and come in a variety of vibrant colors that naturally draw children’s attention. The act of holding a crayon and applying it to paper helps develop fine motor skills, which are crucial for writing. But beyond that, crayons can make learning to read an interactive and creative experience.

Tip 1: Color-Coding Words for Visual Learning

One of the first things you can do with crayons is to color-code words. Children often struggle with recognizing different parts of a word, especially in the early stages of reading. By using crayons, you can help them visually separate letters, sounds, and syllables.

For example, if you’re teaching your child to read the word “cat,” you can have them write the word with a crayon. Then, use a different color to underline the “c,” “a,” and “t” separately. This method not only reinforces the individual sounds each letter makes but also helps them see how those sounds come together to form a word.

My son, for instance, loved using red for consonants and blue for vowels. It was a simple system, but it worked wonders in helping him recognize and remember different sounds.

Tip 2: Making Sight Words Stick with Crayon Art

Sight words are a cornerstone of early reading. These are common words like “the,” “and,” or “is” that children need to recognize by sight rather than by sounding them out. Crayons can be a fantastic way to help these words stick in your child’s memory.

One activity we enjoyed was creating “sight word art.” I would write a sight word on a piece of paper, and then my son would use crayons to decorate around the word. He’d draw pictures that related to the word or just color the letters in fun, creative ways. The key was repetition—each time he saw the word, it became more familiar, and associating it with something fun made it easier to remember.

Tip 3: Building Vocabulary with a Crayon Word Wall

A word wall is another great way to use crayons to build reading skills. Choose a wall or a section of a wall in your home, and dedicate it to words your child is learning. Write each word on a piece of paper with a crayon, and let your child help you put it up on the wall.

To make it even more engaging, you can color-code the words based on categories like nouns, verbs, or adjectives, or even by difficulty level. Every time your child learns a new word, they can add it to the wall. Over time, they’ll have a visual representation of all the words they’ve mastered.

In our home, we had a “rainbow word wall,” where each category of words was a different color of the rainbow. It was a simple idea, but it brought so much joy and pride to my son as he saw his vocabulary grow.

Tip 4: Encouraging Creativity Through Crayon Storytelling

Reading and storytelling go hand-in-hand. Encouraging your child to tell their own stories using crayons can be a powerful way to develop their reading skills. Give them a simple prompt, like “draw a picture of a dog going on an adventure,” and then ask them to tell you the story behind the picture.

As they describe the picture, write down their words using crayons, allowing them to see the connection between spoken and written language. You can even work together to add labels or captions to their drawings, reinforcing the words they’re learning.

When my son was younger, we created an entire book of “crayon stories,” each page featuring one of his drawings and a short story he dictated to me. It was a wonderful way to blend creativity with reading practice.

The Bottom Line

Using crayons to teach reading skills is a simple, affordable, and effective method that makes learning to read a creative and enjoyable experience. By incorporating crayons into your early reading activities, you can help your child develop a love for reading while also strengthening their understanding of letters, sounds, and words.

Remember, the goal isn’t just to teach your child to read, but to help them fall in love with reading. Crayons, with their endless possibilities for fun and creativity, can play a big role in that journey. So grab a box of crayons, and let the learning begin!

Other Ways to Help and Encourage Young Readers:

  • Important Early Literacy Terms That Every Parent Needs to Know
  • Tips for Helping Early Readers
  • Reading Assessments for Reading Success

PIN THIS FOR LATER

September 29, 2024 2 comments
0 FacebookTwitterPinterestPocketThreadsBlueskyEmail
finished turkey veggie platter tray
Activitiescookingfamily funfamily lifeholidaysthanksgiving

Fun Thanksgiving Turkey Veggie Tray

by Teach Mama September 29, 2024
written by Teach Mama

Looking to make Thanksgiving dinner fun and festive for your little ones? This veggie turkey platter is not only a healthy addition to the table but also a creative activity your kids will love! With a few simple veggies, you can turn your appetizer tray into a turkey that’s kid-approved and dinner-ready!

Brightly colored veggies arranged to form the image of a turkey on a platter

Thanksgiving dinner is all about family, and what better way to involve your kids than with a fun veggie turkey project? This easy Thanksgiving craft doubles as a healthy dish, bringing creativity and fresh flavors to the table. No more boring vegetable trays—let’s make a veggie turkey that will impress everyone!

vegetables needed to make a turkey veggie platter tray, including carrots, cucumbers, celery, and peppers

How to Make a Turkey Veggie Platter

The process of making this turkey veggie platter couldn’t be easier! It’s an adorable activity for the whole family that literally turns into something good to eat!

Here is a quick video of the process, from making the dip to arranging the veggies! Check it out and you’ll be ready to make your own turkey veggie tray in no time!

Turkey Veggie Tray Video

[adthrive-in-post-video-player video-id=”vVHpCJ3Q” upload-date=”2024-10-10T00:17:20+00:00″ name=”Easy Turkey Veggie Tray” description=”” player-type=”default” override-embed=”default”]

Step 1: Gather Your Ingredients

Get ready to build your turkey! Start with these simple, healthy ingredients for a colorful and creative platter.

  • Cucumber – Leave the peels on for a nice contrast on the tray.
  • Carrots – Baby carrots are easy to use, but you can also grab whole carrots and slice them!
  • Celery – Use the stalks for the platter and the leaves for the grass under the turkey!
  • Bell pepper – Grab several different colors, but use red for the turkey face for the best contrast against the dip.
  • Black Olives – These are optional, but they make super cute turkey eyes!
  • Ranch Dip – We use this easy Ranch Dip that can be made without sour cream and is literally SO delicious!
3 image collage of arranging the dip and veggies to make a turkey tray for thanksgiving

Step 2: Start Building the Turkey

Now comes the fun part—assembling your turkey! Let your kids take the lead as they piece together the veggie turkey on a festive tray. It’s like painting, but with food!

First, thoroughly wash all of the veggies. I like to use a vegetable scrubber on the carrots rather than peel them but suit yourself! Then quarter one pepper and or ring-slice the rest, slice the carrots into strips lengthwise for feathers and separate the broccoli florets.

I like to let the kids cut the eyes, beak, wattle and feet…under close supervision, of course! Then you build your turkey!

close-up of the turkey face made of bell peppers, carrots, and olives
  1. Create the body: Place the quartered yellow pepper in the center of the tray.
  2. Add the face: Stick mini cucumber wedges into the pepper for eyes and place the orange pepper triangle as the beak.
  3. Form the feathers: Arrange carrot sticks, bell peppers, and tomatoes behind the body like a fan, creating a colorful display.
  4. Complete the details: Use orange peppers for the feet and red pepper for the turkey’s waddle. Add broccoli for grass and scatter pepper and tomato “flowers” for a finishing touch.
The finished turkey veggie tray made from celery, carrots, bell pepper, cucumbers, surrounding a bowl of ranch dip.

Step 3: Let Your Kids Get Creative

The best part about this project is watching your kids use their imaginations! They can create patterns with the vegetables and choose their own favorite colors and textures. It’s a fun, hands-on way for them to contribute to the Thanksgiving spread while learning about healthy food choices.

A year or two ago, our daughter and grandson made this beautiful veggie turkey!

A young boy dressed in an elf costume holding a veggie turkey platter

The Finished Turkey: A Colorful, Fun, and Healthy Centerpiece

Your veggie turkey is now complete, and it’s sure to be the star of the Thanksgiving appetizer table. The kids will be proud of their creation, and you’ll love serving a healthy, colorful dish that’s bursting with fresh vegetables.

Don’t forget to serve the dip on the side—our turkey was way too big to fit it on the same tray! (Delicious Ranch Dressing recipe below!)

Looking for some Thanksgiving Go-Withs?

Try These Delicious Side Dishes From Our Friends at A Modern Homestead!

  • Two-Minute Ranch Dressing
  • Homemade Jellied Cranberry Sauce
  • Homemade Dinner Rolls

More Awesome Thanksgiving Ideas

Looking for more fun ways to celebrate Thanksgiving with your family? Check out these favorites:

  • Thanksgiving Thankful Door
  • Make Your Own Butter – Holiday Science and Fun for the Kids
  • Fall Owl Craft
  • Thanksgiving Printables for Kids
  • Our Favorite Cyber Monday Buys

PIN THIS FOR LATER

Closeup image of the finished turkey veggie tray with a text overlay that says thanksgiving turkey veggie tray a fun family activity
September 29, 2024 2 comments
0 FacebookTwitterPinterestPocketThreadsBlueskyEmail
9 square grid with images of Thanksgiving printables
Activitiesholidaysthanksgiving

Our Favorite Thanksgiving Printables for Kids!

by Teach Mama September 29, 2024
written by Teach Mama

Looking for fun and creative Thanksgiving printables to keep your kids entertained? These Thanksgiving activities will engage and entertain your kids while giving them some much-needed downtime (and maybe you a little peace and quiet!). From conversation starters to fun puzzles, these printables will make Thanksgiving even more special!

9 square grid with images of Thanksgiving printables

We love swinging into the holiday spirit and what could be better than these fun and colorful Thanksgiving printables?

Easy and Engaging Thanksgiving Printables for Kids

Printed place card on a gold-rimmed plate with a space for name, date and what the person is thankful for

1. Printable Thanksgiving Thankful Place Cards from Down Redbud Drive

Use these Thanksgiving Thankful Place Cards this year to put the focus on what you’re thankful for at the dinner table! This Thanksgiving don’t take your get-together for granted! Family is so precious, and I have always loved Thanksgiving for that.

Make something this year that you can all fill out, and then look back on. This is such a simple way to have written memories of friends and family that you can cherish forever.

Thanksgiving-themed word search sheets on a wooden table

2. Thanksgiving Word Search from Teach Mama

Keep your kids entertained and learning this holiday season with a Thanksgiving Word Search! Perfect for cozy afternoons, Thanksgiving break, or while waiting for the big feast, this word search is a fun way to engage kids with Thanksgiving-themed vocabulary.

Printed Thanksgiving Gratitude A to Z list with fall color leaves and outline for the border

3. Thanksgiving A-Z Gratitude List from Down Redbud Drive

This Thanksgiving A to Z gratitude list printable is a great way to put the focus on what you’re thankful for! It’s free to print, and would even make a great activity for Thanksgiving day for the whole family!

Black and white coloring sheet with a turkey and two pumpkins with swirling leaves

4. Happy Thanksgiving Coloring Sheets from Mom’s Life Made Easy

Download this cute Happy Thanksgiving Coloring Page FREE for kids! It’s a wonderful way to keep kids busy while you are prepping for the holidays! Great for toddlers, preschool, and for kids elementary age too!

Red lunchbox with printed fun fact notes scattered in and around

6. Fun Thanksgiving Fact Lunchbox Notes from Teach Mama

Add a dash of learning and fun to your child’s lunch this Thanksgiving with Fun Thanksgiving Fact Lunchbox Notes! These printable notes are packed with fascinating Thanksgiving trivia that will keep your kids entertained and let them know you are thinking of them during lunchtime.

Three Bingo cards with colorful Thanksgiving graphics surrounded by character cards, each containing one of the Bingo card graphics

7. Thanksgiving Gobble-Gobble Bingo from Teach Mama

Thanksgiving Bingo is a great way to fill extra moments with some light-hearted fun. Whether you use Gobble-Gobble Bingo for Thanksgiving parties or as a quick activity to play at home, it’s a wonderful way to add some festive fun to the season.

Paper slips printed with gratitude questions in a mason jar.  A hand is pulling one slip from the jar

8. Thanksgiving Gratitude Game from Down Redbud Drive

Play this Thanksgiving gratitude game at your family gathering this year! Focus on all the things you’re thankful for and learn more about your friends and family with this free printable Thanksgiving activity!

Even More Thanksgiving Themed Fun and Learning!

  • Thanksgiving Thankful Door
  • Veggie Turkey Plate
  • Making Butter Like Our Ancestors Did
  • Fall Owl Craft

PIN THIS FOR LATER

September 29, 2024 4 comments
0 FacebookTwitterPinterestPocketThreadsBlueskyEmail
Two Thanksgiving-themed word search puzzles with colorful Thanksgiving images sitting on a wooden table
holidaysindoor activitiesreadingvalentine's dayword consciousness

Thanksgiving Word Search: Free Download

by Teach Mama September 29, 2024
written by Teach Mama

Keep your kids entertained and learning this holiday season with two free printable Thanksgiving Word Searches! Perfect for cozy afternoons, Thanksgiving break, or while waiting for the big feast, these word search puzzles are a fun way to engage kids with Thanksgiving-themed vocabulary fun.

Two Thanksgiving-themed word search puzzles with colorful Thanksgiving images sitting on a wooden table

Thanksgiving is a wonderful time for family, food, and festive activities. While you’re preparing the meal or relaxing after a busy day, a Thanksgiving word search is a great way to keep your kids entertained and focused. They’ll have a blast searching for holiday-themed words like “turkey,” “pilgrims” and “thankful.” Don’t worry, I have included an answer key!

Thanksgiving Word Search Fun

Getting Ready to Search

  • Print these colorful word search puzzles on bright white cardstock to make them “pop.” Be sure to have plenty! Kids of all ages will want to take a crack!
  • Have colored pencils and markers on hand to add to the fun!
  • Put some blank cardstock out with the puzzles for the younger kids to use as guides for their search.

Easy to Play, Easy to Love

Word searches might seem like a jumble of letters at first, but with some strategies, kids can quickly become pros! Here are a few tips for making the most of their Thanksgiving word search:

  • Search Line by Line: Have your child focus on one line at a time, looking for the first letter of the word and then finding the second and so on.
  • Use a Paper Guide: Slide a piece of paper down each line to help them focus on just the letters they’re scanning.
  • Repeat the First Letter: For younger children, saying the first letter out loud as they search can help them stay focused.
  • Spot Double Letters: Encourage them to find double letters—words like “pumpkin” are easier to spot because of the repeated letters!

Add Extra Fun to the Word Search

To make things even more interesting, try these creative twists:

  • Use a highlighter to highlight each word.
  • Choose a different color for each word found.
  • Paint over the words with watercolors for an artsy touch.
  • Circle each letter of the word or circle the entire word.
  • Let your child draw a picture of each word beside it on the word list.
Thanksgiving Word Search Printables each with colorful Thanksgiving-themed graphics

Grab Your Free Thanksgiving Word Search Printable

Throw your email in the box below to receive the free download:

Here is some more Thanksgiving-themed fun for kids:

  • Thanksgiving Thankful Door
  • Turkey Veggie Plate
  • Make Butter Like Our Ancestors Did
  • Fall Owl Craft
  • Our Favorite Thanksgiving Printables for Kids
  • Thanksgiving Gobble-Gobble Bingo
  • Fuun Thanksgiving Fact Lunchbox Notes

PIN THIS FOR LATER

September 29, 2024 0 comments
0 FacebookTwitterPinterestPocketThreadsBlueskyEmail
Red lunchbox with printed thanksgiving fun fact notes scattered around on a wooden table
holidaysreadingthanksgiving

Fun Thanksgiving Fact Lunchbox Notes

by Teach Mama September 29, 2024
written by Teach Mama

Make lunchtime extra special this November with Fun Thanksgiving Fact Lunchbox Notes! These easy-to-print notes will entertain your kids while they learn cool turkey day trivia. Add some seasonal fun to their lunchboxes with these quick, fun facts about Thanksgiving!

Red lunchbox with printed thanksgiving fun fact notes scattered around on a wooden table

Thanksgiving-themed lunchbox notes are a creative way to connect with your child during their school day. They’ll love discovering new facts about Thanksgiving traditions, food, and history while enjoying their meal. Plus, these notes spark curiosity and can even be shared with friends!

Fun Thanksgiving Fact Lunchbox Notes for Kids: Printable and Ready to Go!

What’s Included in the Printables?

Our printables include a variety of kid-friendly facts, such as:

  • Fun turkey trivia. Did you know that Turkeys can run up to 20 mph?
  • The history of the first Thanksgiving
  • Silly Thanksgiving records
  • Fun food facts like how many turkeys are eaten each year

How to Use the Lunchbox Notes

Simply print, cut, and tuck these Thanksgiving fun facts into your child’s lunchbox. You can also include them with snacks for an after-school treat! To really make the colorful graphics pop, use a bright, white cardstock.

Printed Fun Thanksgiving Fact Lunchbox Notes with colorful Thanksgiving-themed graphics

Get Your Thanksgiving Printables Today! Throw your email in the box below and the download will appear in your inbox.

Here is some more Thanksgiving-themed fun for kids:

  • Thanksgiving Thankful Door
  • Turkey Veggie Plate
  • Make Butter Like Our Ancestors Did
  • Fall Owl Craft
  • Our Favorite Thanksgiving Printables for Kids
  • Thanksgiving Gobble-Gobble Bingo
  • Thanksgiving Word Search

PIN THIS FOR LATER

September 29, 2024 0 comments
0 FacebookTwitterPinterestPocketThreadsBlueskyEmail
Colorful Thanksgiving-themed Bingo boards surrounded by Thanksgiving character cards on a wooden table
holidaysprintablesreadingthanksgiving

Thanksgiving Gobble-Gobble Bingo Game

by Teach Mama September 29, 2024
written by Teach Mama

Get ready to add some festive fun to your Thanksgiving celebrations with this Thanksgiving Gobble-Gobble Bingo game! Perfect for classroom parties, family gatherings, or just a fun at-home activity, this game is easy to set up and sure to bring Thanksgiving joy. Whether you’re planning a class party or a cozy family game night, this free printable will be a hit!

Colorful Thanksgiving-themed Bingo boards surrounded by Thanksgiving character cards on a wooden table

Because we homeschooled, we didn’t have big class parties like in public schools. Instead, we created our own fun to celebrate the Thanksgiving season. Games like Thanksgiving Gobble-Gobble Bingo are a quick and easy way to bring a little holiday excitement into your day!

Gobble-Gobble Bingo is Turkey Day Fun for Everyone!

Get Ready to Play Gobble-Gobble Bingo:

Step 1: Gather Your Supplies

To play Thanksgiving FEAST Bingo, you’ll need a few simple supplies:

  • Free Printable Thanksgiving FEAST Bingo Boards (download below)
  • White Cardstock (for printing the boards and cards)
  • Scissors (to cut out the bingo cards)
  • A Container (like a mason jar or Thanksgiving-themed basket to hold the picture cards)
  • Game Markers (you can use gems, candy, or any small items)

Step 2: Prep Your Container

Add a festive touch by storing the bingo cards and markers in a fun container. A mason jar filled with crinkle paper works great, or you could reuse a small basket or Thanksgiving decoration. Keep it handy, and you can use the container year after year!

Step 3: Cut Out the Bingo Cards

Print your Thanksgiving Gobble-Gobble Bingo boards and picture cards onto white cardstock. For durability, consider laminating the cards to protect them from spills and sticky fingers. Once printed, cut out the bingo cards and add them to your container.

Let the Game Begin!

OPTION 1 – Pass the Jar

Pass the jar around and have each player draw a card and call out the image and the letter (F, E, A, S, or T). Players then check their boards to see if they have the image in the corresponding column. If they do, they can place a marker on that spot. Keep playing until someone fills a row and shouts “Bingo!”

OPTION 2 – Roll the Die

Create a foam die with the letters F-E-A-S-T on five sides, and a turkey symbol on the sixth side. If the turkey symbol comes up on a roll, that’s a “freebie,” and the player can place a marker wherever they like on their board.

OPTION 3 – Group Play

In a classroom or large group setting, designate one person to draw the cards and call out the images and letters. Players mark their boards as the game progresses. For extra fun, let the players customize their own Bingo cards with Thanksgiving-themed images before the game begins!

Make It Extra Fun!

For an added twist, try using themed markers like candy corn, cranberries, or autumn-colored buttons. At home, you can even use small toys or Thanksgiving-themed trinkets. And don’t forget, if you roll a “freebie” turkey, you can place your marker anywhere on your board that matches the picture!

Instead of shouting “Bingo!” when they have all the pictures in a row covered, have the kids shout “Gobble-Gobble!” in their best turkey voice!

Three Thanksgiving themed Bingo boards on a wooden table

Download Your Free Thanksgiving Gobble-Gobble Bingo Game

The free download includes six different Bingo boards, each with a colorful Thanksgiving theme. The set also includes the F-E-A-S-T cards and picture cards needed to play the game.

For markers, you can use buttons, pennies, or fun items like candy corn. If you’re using this game for a classroom or party, enlarge the picture cards so all the players can easily see which cards are drawn.

Make sure you print enough boards for everyone, and have a couple of copies of the picture cards ready for group play. Using big cards will help everyone follow along during the game!

Get your Gobble-Gobble Bingo fun started! Just pop your email into the box below, and the download will be sent straight to your inbox, ready to bring some Thanksgiving fun.

For More Thanksgiving Fun, Check Out These Great Ideas:

  • Thanksgiving Thankful Door
  • Turkey Veggie Plate
  • Make Butter Like Our Ancestors Did
  • Fall Owl Craft
  • Our Favorite Thanksgiving Printables for Kids
  • Fun Thanksgiving Fact Lunchbox Notes
  • Thanksgiving Word Search

Happy, Happy Thanksgiving!

PIN THIS FOR LATER!

September 29, 2024 0 comments
0 FacebookTwitterPinterestPocketThreadsBlueskyEmail
Card Owl craft printable on white and brown cardstock
craftsfamily funfamily lifethanksgiving

Three Fall Owl Crafts for Kids

by Teach Mama September 13, 2024
written by Teach Mama

Get ready for some autumn creativity with these adorable fall owl-themed fall crafts! Perfect for kids and adults alike, these easy and fun projects will bring a touch of whimsy to your seasonal décor. Whether you’re using paper rolls or yarn, these fall owl crafts are a hoot to make!

DIY owl crafts with owls made from paper rolls, jars and a printable card owl with the printable sitting on a wooden table

Growing up I remember making small craft projects with my mom around the holidays and these bring back memories of those times. Now I’m doing the same thing with my grandkids! Join the fun!

How to Make a Fall Owl Craft

These charming fall owl crafts can be made with just a few supplies you likely already have on hand! From yarn-wrapped owls to cute paper roll creations, these fun fall crafts will keep everyone entertained. Easy-peasy when you follow the step-by-step instructions below.

Three paper roll craft owls.  One with brown yarn for the body, one with cupcake wrappers for wings and the third with construction paper wings and body sitting on a wooden table with yarn in the background

Easy Owl Crafts for Kids VIDEO

Check out this quick video with a few different ways to make these adorable owls! Then grab the download below and get started!

[adthrive-in-post-video-player video-id=”mp6mfMJ9″ upload-date=”2024-10-10T00:17:20+00:00″ name=”Easy Fall Owl Craft for Kids” description=”” player-type=”default” override-embed=”default”]

Paper Roll Owls

With a simple paper towel or toilet paper roll and some decorative paper, you can make the cutest little fall owl in no time!

Step 1: Flatten the Roll

Flatten the paper towel or toilet paper roll by pressing down on the top and bottom. Then, score a half-circle on both sides of the top with a blunt object like an empty pen.

Step 2: Cover with Paper

Wrap the tube with construction or scrapbook paper for a decorative touch. Carefully fold the scored tops inward to create the owl’s ears.

Step 3: Add Wings and Decorations

If you want, you can cut wings directly into the tube. Otherwise, attach your wings using items like cupcake cups, tissue paper, or whatever you have on hand. Decorate the body with patterns or markers, and don’t forget to add a small triangle for the beak.

Step 4: Attach the Eyes

Glue googly eyes above the beak, letting them overlap the top just a little for a whimsical look!

A mason jar wrapped in gray yarn with cupcake wrappers for wings, an orange paper triangle for a beak, bottle-cap google eyes sitting on a wooden table in front of yarn

Yarn Owl

This yarn owl craft is perfect for adding texture to your seasonal décor. All you need is a jar, some glue, and a ball of yarn!

Step 1: Wrap the Yarn Around the Jar

Start by covering a jar (plastic preferred for kids) with liquid glue up to the threads. The wrapp the yarn around the jar about 1/4″ below the threads. Wrap upwards and then back down over the beginning of the yarn.

This will cover the cut edge and prevent unraveling. Wrap the yarn all the way down the jar. (go back over the middle several times if you want a fatter owl)

Step 2: Attach the Beak and Eyes

Use a drop of hot glue to attach a small triangle for the beak. Make your eyes however you want—bottle-caps and googly eyes are always a favorite! Hot glue them just above the beak.

Step 3: Add Wings

The last step is to attach the wings. We used mini cupcake wrappers folded in half that I had left over in the back of a drawer. If you want to try something different, you could cut out ovals and decorate them before attaching them with hot glue.

Optional:

Decorate the jar lid with yarn, or even turn it into a cute little hat!

What Will You Store Inside?

Fill your fall owl jar with candy corn, M&Ms, mints, or maybe a homemade treat to surprise your guests!

Printable card stock owl crafts.  One on brown card stock with pink yarn stitched around the wings and tummy and one with cupcake wrappers for wings and a body colored with crayon sitting on a wooden table in front of yarn

Owl Card Craft

This craft combines a little sewing and coloring for a beautiful fall owl card with a fun twist. For best results print on bright white cardstock for creative coloring or even fall colors cardstock.

Step 1: Decorate Your Card

If you are going to use watercolors, pens, pencils, colors or tissue paper then do that before cutting out the card, the window and punching the sewing holes. If you’re going to use acrylic paint, you’ll need to cut out the card, punch out the holes and the window before painting since the paint will cover up those markings.

Step 2: Punch Sewing Holes

Use a 1/8″ hole punch to punch the sewing holes around the window. We also eyeballed some holes around the edge of the wings. Totally optional!

Step 3: Sew Around the Window

Thread a tapestry needle with your yarn. Leave a 2″ tail of yarn when you start sewing from the side that will be inside the card–you’re going to tie the ends together when you’re done.

We chose to make a woven grid pattern on our card, but you could do it however strikes your fancy. then we finished up the edge of the window with a simple embroidery back stitch. Again very optional!

Optional:

Another option would be to cover the window with bits of colored tissue paper for a stain glass effect. We found it was easier to cover the window with a single piece of tissue paper first and then layer bits of torn tissue on top of that.

Step 4: Assemble the Owl’s Face

Glue on a small triangle for the beak and attach the eyes. You can use soda bottle caps filled with googly eyes or just the eyes themselves!

Step 5: Add Wings

Almost finished… decorate the wings included in the printable or use folded cupcake wrappers, or maybe a couple of colorful fall leaves. Hot glue the wings in place and you’re done!

Card Owl craft printable on white and brown cardstock

Want your own card owl printable? Just throw your email in the box below and the download will appear in your inbox.

Even More Fun Fall Activities!

Looking for more fall-themed ideas? Check out these other activities and adorable projects:

  • Our Favorite Thanksgiving Printables for Kids
  • How to Make Homemade Butter
  • Leafy Indoor/Outdoor Alphabet Hunt
  • Musical Leaves – Fun Fall Indoor Activity
  • Fun Fall Leaves Math Grid Game

PIN THIS FOR LATER

September 13, 2024 1 comment
0 FacebookTwitterPinterestPocketThreadsBlueskyEmail
Child dressed as a clown holding a red balloon
Mental Healthparenting

Dealing With Childhood Fears – A Parent’s Guide

by Teach Mama September 8, 2024
written by Teach Mama

Fear is a normal and unavoidable part of childhood. As parents it’s important to know how to support our kids through those childhood fears to safety on the other side. Here are some practical tips for addressing those monsters under the bed in a way that empowers your child to feel safe, secure and confident.

Child dressed as a clown standing on a driveway looking up at the moon

I remember seeing “Dark Shadows” (a very dark soap opera from my childhood) as a kid at my cousins’ house. I didn’t tell anyone how scared I was, but let me tell you, I had a serious problem with vampires for years as a result!

Childhood Fears

Let’s face it, our kids don’t have much life experience. So for a while everything is new and potentially dangerous and scary. They don’t know yet what things really are scary and which things aren’t. We can help them with that. So let’s talk about FEAR.

Where Does Fear Come From?

That’s a great question and an important place to start. Unfortunately it’s not easy to answer because fear can come from all sorts of places.

Specific Incidents That Create Fear

Fear may result from being involved in an incident of some sort they don’t understand or haven’t processed. Car wrecks, abuse, violence, tornadoes and other natural disasters are examples of the kind of incidents kids may need help processing.

TV, Movies and the News

Like my brush with the horror genre at a very young age, fear doesn’t have to be logical or about real things. In fact, it often isn’t. Like vampires.

But in today’s world there are a lot of scary real things being reported on the 24 hour news cycle every day. Movies can also pose a problem for children who may not be able to tell the difference between reality and fiction.

Our brains aren’t really wired to tell the difference easily. That’s why you jump at horror or suspenseful programs!

Misunderstanding a Conversation or Situation

I had a young client who screamed in terror every morning when her mom dropped her off at daycare. Her terror was so overwhelming that school was impossible. We did all the things and finally she started making progress.

But I didn’t know where the fear came from until our last session when her mom casually mentioned a fire in their neighborhood. That little girl had watched firemen bring the old woman who made her cookies out on a gurney! Ding Ding Ding!

All that time she had been terrified to leave her mom because she thought something awful would happen to her while she was at daycare! Remember, just because you understand something doesn’t mean your child does. Check in often and explain what they don’t understand.

Common Fears

Here are some common fears experienced by children:

  • The dark
  • Unfamiliar noises at night
  • Monsters, ghosts and vampires etc
  • Big animals – dogs, dinosaurs, horses etc
  • Snakes and spiders
  • Storms
  • Being alone
  • Angry adults – parents, teachers, even actors on the screen
  • Strangers
  • Scary TV, movies, news
  • Doctors, dentists, shots and needles
  • Failure and rejection

Understanding the Fear

Before you can conquer something you have to understand it. Whether it’s that terrifying IRS form or an equally terrifying souffle recipe. A child’s fear is no different.

Does the fear interfere with your child’s life (or yours)? — Since you’re reading this post I’m going to assume the answer is “yes” and move on to the second question.

What purpose does the fear seem to serve? — Often it’s just to avoid, or be reassured and comforted. But sometimes fear serves other purposes. Like protecting them from something they may not have language to talk about.

I knew a girl who developed a fear of bathing. She would go swimming but soap and water, no way! She became very isolated because in a word, she stunk. Her fear of bathing kept her stinky which in turn kept her abuser uninterested! Look for fear’s purpose.

When did the fear start? Try to pinpoint when a fear started. Then think about what was happening around that time in the home, at school, in the community. Is there a connection?

Mom and child talking on a sofa in watercolor style

Dealing With Fear

Remember that getting rid of the fear is only part of the solution. We want our kids to know how to deal with it on their own at some point. Fortunately it’s a skill we can model, teach and learn.

  • Normalize and validate – Everyone has fears, they are normal. Say, “I understand how that could be frightening.”
  • Model coping skills – You can tell children how you deal with fear, but it’s much more meaningful if they see you coping. Talk with them about how they that might do the same thing. Help them connect the dots..
  • Understand your own fears – What are you afraid of? Is your fear being communicated to your child?
  • Be aware of outside influences – This includes media, people and situations that may be causing the fear.
  • Minimize avoidance – I know this sounds wrong, but avoidance alone is not the answer. It teaches running away as the answer to fear instead of actually dealing with it.
  • Externalize the fear – This is a fancy way of saying make the fear separate from them. Sometimes I have kids draw what their fear looks like. Not necessarily the object of the fear, but the emotion or feeling of fear itself. When its separate from them it’s easier to talk about… and conquer.
  • Talk about the externalized fear – “Play” is the native language of children! So young kids may not have adequate words to actually “talk” about what’s bothering them. Try playing it out with toys instead.
  • Give the child control over the fear – This is an important step in teaching anyone to deal with fear! This is a place where a child’s native imagination can be a HUGE help. Do they have superhuman powers to defeat fear? Or do they pray for angels to stand guard over them? But then again it might also be as simple a matter as putting a lamp beside their bed. Then they have the power to reassure themselves there are no monsters in the room.
  • Prayer – For believing and observant families a practice of praying for strength, calm, peace and protection may be helpful.

The Don’ts in Dealing with Your Child’s Fear

Your child needs to know you are there to help and support them. They need to know you take them seriously. In short, they need to be able to trust you. This is a list of trust killers. Avoid them like the plague!

  • Don’t use shame! – It won’t work and will make the problem even bigger! You don’t want to do anything to make your child hesitate to come to you with a problem.
  • Don’t diminish or make light of their fear – Even if the fear doesn’t seem like a big deal to you, I guarantee it feels HUGE to your child.
  • Don’t make fun of them for having a fear – This one makes your child feel small and unimportant.
  • Don’t force them to confront their fear head on – I’m fearful of snakes. I’m not going to be helped by being forced to go to a rattlesnake round-up. In fact it’s probably going to make the problem a lot worse.
  • Don’t (as in never) share or discuss your child’s fears in front of others – At least not without their expressed permission. You may need to talk to a doctor or counselor at some point, but that’s an entirely different thing than discussing their fear at the pool with your buddies or over a family meal.

This is Your Time to SHINE as a Parent!

More Parenting Resources That You May Find Helpful:

  • Help Your Kids Build Life Skills This Summer
  • Helping Your Kids Manage Anxiety
  • The Importance of Unstructured Play for Kids
  • Make the End of School Special with a Family Dinner to Remember
  • Noticing Your Kids…In a Good Way!
  • Handling Sadness, Tragedy and Grief as a Family
  • How to Get Your Kids to Open-Up
  • 9 Things All Kids Must Hear Their Parents Say

PIN THIS FOR LATER

September 8, 2024 0 comments
0 FacebookTwitterPinterestPocketThreadsBlueskyEmail
Boy in blue denim jacket reading at a table in watercolor style
early literacyreading

Reading Assessments for Reading Success

by Teach Mama September 8, 2024
written by Teach Mama

Does the thought of teaching your kiddo to read (and spell) fill you with all sorts of insecurity? Where does a parent even start? Here are some proven, easy-to-use reading assessments to help you get started with confidence.

Boy reading a book with a pencil in his hand in watercolor style

Our oldest son struggled learning to read. He could sound out “big” words like “metamorphosis” just fine but had an ongoing issue with the “little” words. Were. That. Was. No matter how many times we practiced high-frequency words it just wasn’t helping.

In a fit of desperation (I AM a reading specialist after all!), we sought some professional assistance. The verdict? At six years old our son had a high-school level vocabulary and listening comprehension that was off the charts. He just needed a little more growing up and lot more patience on our part.

Knowing where your child is NOW in their reading journey and having a path to follow helped us. It can help you too!

Reading Assessments? Sounds Intimidating.

Think of these reading assessments as the “Start” square on your favorite board game. That’s not too scary, right? A reading assessment is just a tool to tell you where to start with your child. In fact, they can be kind of fun to take! Some are online and not too different from games your kiddo may already play.

Some Free and Some Not-So-Free Assessments to Consider

There are lots of assessments to choose from. Some are free and downloadable, some are online, some are available for a fee and some you can have administered by a professional. In each case, at the end, you will have a summary of the results to work with going forward.

As both a “professional” and a homeschool mom, I leaned toward the free online or downloadable versions so that’s what we’ll mostly be talking about. However, if you feel your child needs a more in-depth assessment due to additional considerations, then consulting a professional would probably be the best decision.

Words Their Way Inventories

I really like this set of reading/spelling inventories that are part of a vocabulary study course you can purchase. The course offers a pathway for study and easy-to-follow instructions for how to assess. That’s nice because you need it when you need it! It also has the scoring sheets to fill out as you assess so there’s not a lot of processing to do at the end.

This inventory is for kids from kindergarten through elementary and on to an upper level assessment. I really appreciate this because with gifted kids they don’t have to stop where their grade would say they should. They can keep going, giving you a clearer picture of where to start with them without covering ground they already understand

This one isn’t very game-like, but it is thorough and well worth the price. There is a newer version, but the older version is great and is available used on Amazon for less money.

QPAS-Quick Phonological Awareness Screening

The QPAS is downloadable and this one is free. It, too, is short and to the point. There is a very clear set of instructions on how to administer the screening. They have also anticipated some of your likely questions about how to give it and some of the what-if situations that might come up.

This screening has a chart of results so you can color code and quickly see, “Oh, we need to work on rhyming words and word families!” I would feel comfortable giving this one at the beginning and end of the year.

Boy in a denim jacket reading at a table in watercolor style

ROAR-Rapid Online Assessment of Reading

This is the one I recommend to parents who are worried about their ability to administer an assessment. You don’t have to do a thing except let your child go through the colorful and engaging “games”.

There are ROAR games that assess the ability to read and understand sentences silently, single word reading, the ability to recognize letters and sounds and the ability to recognize and use phonemes (phonics).

With ROAR their several assessments are useful for kids from kindergarten through twelfth grade! You won’t have to find one that fits your younger children and a different one for the older kids. And they do all the processing and scoring and present you a very usable report of your child’s results at the end. So great!

What Comes Next?

Your child has finished the assessment and you have the report in hand… now what? Well, this is the part of the program where all the fun happens! Once you know what your child needs to work on, you can find all sorts of activities and games to do at home with them. There are a lot of them right here on TeachMama!

Other Reading Resources You May Find Helpful:

  • How to Help Your Child Be a Better Reader
  • Kindergarten Summer Reading Readiness
  • Reading Assessments for Reading Success
  • Backyard Adventure Begins with “The Never Starting Tales”
  • Leafy Indoor/Outdoor Alphabet Hunt

PIN THIS FOR LATER

September 8, 2024 6 comments
0 FacebookTwitterPinterestPocketThreadsBlueskyEmail
Watercolor style image of a boy reading in front of a fireplace
early literacyreading

Tips for Helping Early Readers

by Teach Mama September 8, 2024
written by Teach Mama

As parents, we are our children’s first teachers, and the steps we take early on can set them up for a lifetime of successful reading and learning. Here’s our guide to some key literacy terms, concepts, and tips that every parent should know to help their child become a capable and confident reader.

Watercolor style image of a mom reading to a little girl beside a pond

Shortly after our third child was born we realized that “opposite” has more than two directions. Each one of our kids learned to read in a slightly different way. However, the basic concepts of learning to read stayed the same for all three. Pointing out sounds, letters, and words as we went along the way was essential to laying the foundation for reading success.

Early Literacy Tips

Supporting your child as they learn to read can feel like a big responsibility, but with the right knowledge and tools, you can make it a rewarding journey for both of you. These are some of the concepts we found to be very useful on our reading journey with our children.

The Role You Play in Early Literacy Development

Let me start by saying, that you’re already doing so much more than you might realize to help your child on their reading journey. Every time you chat with your little one during diaper changes, describe what you’re doing as you prepare meals, or point out things on your walk in the park, you’re laying the groundwork for their literacy skills.

Talking, singing, and reading with your child are some of the most powerful tools you have. These everyday activities are more than just bonding moments—they’re opportunities to build a solid foundation for reading and writing.

But as your child approaches school age, it’s helpful to get familiar with a few key terms and strategies that can make a big difference in how you support their learning.

Key Literacy Terms Every Parent Should Know

When it comes to helping your child become a strong reader, understanding these fundamental literacy concepts will empower you to be more effective in your role.

Comprehension

Comprehension is the heart of reading. It’s not just about reading words on a page; it’s about understanding and making meaning from what you read. Even before your child can read on their own, you can help them develop comprehension skills.

Talk about the stories you read together, ask them questions, and encourage them to think about what might happen next. This process of making connections, asking questions, and thinking critically about a story is what builds strong comprehension skills.

Decoding

Decoding is a fancy word for figuring out what a word says. When your child encounters a new word, they use decoding skills to break it down and sound it out. This is where understanding the relationship between letters and sounds (a concept called phonics, which we’ll get into next) becomes essential. Decoding is one of the first steps in learning to read independently.

Fluency

Fluency is the ability to read smoothly and expressively. It’s not just about reading quickly, but about reading in a way that makes the text easy to understand. Think of fluency as reading with the rhythm and expression of natural speech.

When you read aloud to your child, model fluent reading by paying attention to punctuation, varying your tone, and pausing where it makes sense. This helps your child understand how fluent reading sounds and feels.

High-Frequency Words

High-frequency words are the words your child will see most often in books. These include words like “the,” “and,” “it,” and “you.” Because they appear so frequently, it’s important for your child to recognize them quickly.

Phonics

Phonics is all about the relationship between letters and sounds. When your child learns that the letter “b” makes the /b/ sound, they’re learning phonics. Phonics instruction helps children understand that letters and combinations of letters represent the sounds of spoken language.

This is crucial for both reading and spelling. You can support your child’s phonics development by pointing out letter-sound relationships in everyday reading, whether you’re looking at signs, labels, or books.

“This a book. The word “book” starts with the letter b. What sound does the letter “b” make? Buh…buh…buh…”

Sight Words

Sight words are those tricky little words that don’t always follow the standard phonics rules. Words like “said,” “was,” and “come” need to be recognized by sight because they don’t sound like they’re spelled.

Flashcards, memory games, and repetition are great ways to help your child learn these words so they can read them quickly and confidently.

Vocabulary

Vocabulary is simply the collection of words your child knows and uses. The more words they know, the better they can understand what they read and express themselves. You can build your child’s vocabulary by talking to them, reading a variety of books, and introducing new words in context.

Encourage your child to ask questions about unfamiliar words and take the time to explain what they mean. Several studies have shown that a rich vocabulary correlates to success in life.

Mom and little girl reading a cookbook in the kitchen in watercolor style

Practical Tips for Helping Early Readers

Now that you’ve got a handle on the key concepts, here are a few practical tips to help you put this knowledge into action:

  1. Read Aloud Daily: Reading aloud to your child is one of the most effective ways to build their comprehension, vocabulary, and fluency. Choose a mix of books—some that are just for fun and others that challenge them with new ideas and words.
  2. Play with Language: Incorporate language play into your daily routine. Sing songs, recite nursery rhymes, and play word games. This makes learning fun and helps your child develop phonological awareness and vocabulary.
  3. Make Reading Interactive: Don’t just read the words on the page—talk about the story. Ask your child what they think will happen next, how a character might be feeling, or why something happened. This helps build comprehension skills and keeps your child engaged.
  4. Create a “Print-Rich” Environment: Surround your child with opportunities to read. Label items around the house, keep a variety of books within reach, and encourage your child to help with grocery lists, recipes, or even reading street signs.
  5. Use Sight Words in Context: Practice sight words in everyday situations. Whether you’re out for a walk or preparing a meal, point out sight words in your environment. This helps your child see the relevance of what they’re learning.
  6. Celebrate Progress: Learning to read is a big deal, and it’s important to celebrate the milestones along the way. Whether it’s recognizing their first sight word or reading a whole book on their own, make a big deal out of their achievements to boost their confidence.
Boy reading in front of a fireplace in watercolor style

You’ve Got This!

Keep it fun, stay patient, and enjoy the journey—you’re building a foundation that will last your child a lifetime.

Other learning resources you may find helpful:

  • Write a Shape Book with Your Pre-Reader
  • Make the Most of a Library Trip
  • Kindergarten Summer Reading Readiness
  • Tips for Helping Early Readers
  • How to Help Your Child Be a Better Reader
  • Backyard Adventure Begins with “The Never Starting Tales”
  • Reading Assessments for Reading Success

PIN THIS FOR LATER

This image has an empty alt attribute; its file name is At-Home-Early-Literacy-Tips-For-Parents.jpg

September 8, 2024 18 comments
0 FacebookTwitterPinterestPocketThreadsBlueskyEmail
Yellow leaf printed on cardstock. Handwritten on the leaf is the instruction to act like a superhero learning to fly
indoor activitiesreading

Musical Leaves – An Indoor Fall Activity!

by Teach Mama September 1, 2024
written by Teach Mama

Musical Leaves is a fun indoor activity to work off lots of energy on those days when the weather outside is less than wonderful and your kids really need some high-energy activity to keep everyone sane and happy! Free printable leaves and game play where every player is a winner!

Oak leaves printed on fall color card stock.  On the back of a yellow leaf is handwritten Act like a superhero learning to fly.

Musical Leaves Indoor Game for Kids

We love playing indoor games with the kids but do not like the fighting that always creeps in when playing games like musical chairs where every round eliminates players.

We wanted the kids to enjoy playing and STAY part of the game.

Musical Leaves is like musical chairs but instead of eliminating players, everyone gets to have even more fun when the music stops.

Preparations Before the Game

I may have mentioned a few times how much I love laminating things. I’d love to be able to laminate the yard and our shaggy poodle, but alas, that is not to be. However this game can be laminated to make it extremely versatile and durable!

  1. Print out the printable leaf shapes on fall colored cardstock. If you only have white, then you can turn your little ones loose with fall colored markers, watercolor paint or crayons to decorate the leaves!
  2. Then cut them out and LAMINATE them!
  3. Now on the blank backside with a dry erase marker write one activity for them to do. Like “Do ten jumping jacks” or “Hula Hoop for 2 minutes” or “Flap your arms like a bird!” You get the idea!
  4. Pick out some upbeat music on your phone.
  5. Put the leaves on the floor in a big circle (or maybe it winds its way through the house?) writing side down.
Oak leaves printed on fall-colored card stock in a circle on a wood floor

Let’s Play Musical Leaves!

Similar to musical chairs, players go from leaf to leaf until the music suddenly stops. Everyone turns over the leaf they are on and does whatever is written on the flip side. The goofier and wiggly-er you can make the activities the funnier and more engaging it will be.

Some of the leaves could be special treat options. Like “Surprise! Have a cookie!” Or “You get to pick the movie tonight!”

No one is put out of this game and it can be played until everyone is pooped and ready for quieter activities… or lunch. Whichever happens first.

When play ends wipe off the dry erase marker instructions and store them until the next time you need them.

Other Fun Ways to Use the Fall Leaves

  • Act out whatever is written. “Act like a monkey on vacation” or “a superhero learning to fly” or “shopping at the grocery store” or “making a free throw” or “sliding into Home”
  • Acting out favorite book characters and see if others can figure out who you are.
  • Saying something a famous person or favorite character (from a book or show) would say. Try to get others to guess who you are.
  • Find the object written. Like a scavenger hunt. This can be easy or challenging. Like “lightswitch” or “something you throw away after use.”

Other Fall Activities For You and Your Kiddos:

  • Fun Fall Leaves Math Grid Games
  • Leafy Indoor/Outdoor Alphabet Hunt
  • 2 Tricks to an Organized School Year

Get Your Free Musical Leaves Printable. Just throw your email in the box below and the download will appear in your inbox.

PIN THIS FOR LATER

September 1, 2024 0 comments
0 FacebookTwitterPinterestPocketThreadsBlueskyEmail
Printable grid game boards with colorful cartoon pumpkins and candy corn markers
halloweenholidays

Counting Hats, Cats and Pumpkins: Halloween Grid Game

by Teach Mama August 31, 2024
written by Teach Mama

Looking for a fun and educational Halloween activity for your little ones? The Hats, Cats, and Pumpkins Grid Game is perfect for reinforcing left-to-right scanning and counting skills. Easy to set up and clean up, this game combines holiday fun with valuable early literacy practice that your kids will love!

Printable grid game boards with colorful cartoon witches' hats, cats and pumpkins

We all love our scarecrow out front, our pumpkins around the house, and the little plastic spider that hangs from a shelf in the kitchen.

So add all those objects of their affection together in a really basic grid game and let them play their way into some learning.

Playing the Hats, Cats and Pumpkin Grid Game

The concept is the same as some of our other grid games, but I modified things slightly for Halloween.

The premise of this game is super-simple, but the early literacy skills of left to right tracking, return sweep, basic word recognition and one to one correspondence it reinforces are really worthwhile.

Printable grid game board with colorful cartoon witches' hats

What You Need

  • Astrobright White Card Stock
  • Blank Six-Sided Dice
  • Flattened Glass Gems or some other marker (even Cheerios!)

I love my set of blank dice for games like this because I can put more than numbers on each side. Sometimes I’ll put a 0 on one side and then 1-5 on the other sides so that there is the possibility of not being able to move at all. Other times I might add a number sight word like “two”.

Get Ready to Play

Print out the game boards – be sure you have enough for each player to have a set of all three boards!

Prepare the dice – as mentioned above

Gather a stack of markers for each player – most of the time on our grid games we use clear glass flattened marbles, but we’ve also used acrylic diamonds and various little tokens–nothing fancy but very fun for little hands–just things sold at craft stores or things you have around the house.

I have a huge button jar so buttons are often our markers. Of course the kids always love edible markers–Cheerios, marshmallows and at Halloween– candy corn!.

For an added bit of fun – After watching Harry Potter for the zillionth time, one kiddo suggested a Golden Snitch element. So we added a star to one side of the die for an instant win!

How to Play

Set up the boards and give each player a stack of markers. Roll the dice. For each number rolled with the dice, that number of objects gets covered, line by line, beginning with the top left and ending bottom right–just like reading words on a page. The first person to fill their page (or roll that magical star) wins!

Printable grid game boards with colorful cartoon pumpkins and cats

Want your own Hats, Cats and Pumpkins Game? Throw your email into the box below and it will appear in your inbox as if by Halloween magic!

Want a Few More Fun Halloween Ideas?

  • Halloween Classroom Party Ideas
  • Halloween Word Search
  • Halloween Joke Notes
  • Halloween Learning Ideas
  • Boo! It’s Halloween Ghost Bingo
  • Cool Halloween Costumes for Kids

PIN THIS FOR LATER

August 31, 2024 25 comments
0 FacebookTwitterPinterestPocketThreadsBlueskyEmail
Child's book open to a cartoon cow and bird floating along in a yellow and red striped hot air balloon.
reading

How to Help Your Child Be a Better Reader

by Teach Mama August 31, 2024
written by Teach Mama

Worried about how you can help your child read better? You’re not alone! Let’s explore positive, gentle ways to support their reading journey, without discouraging their efforts. Understanding how to help your child develop a growth mindset about reading can make all the difference. Here’s how you can correct and encourage learning with love and patience.

Child's book open to a cartoon cow and bird floating along in a yellow and red striped hot air balloon.

Correct Reading Mistakes with Love and Patience

To correct or not to correct. That is the question.

(A tiny little Shakespeare joke… my bad.)

Lots of parents worry about this. So let’s talk a minute about some constructive and positive ways to help your child read better.

How Does Your Child Feel About Correction?

First consider how you feel when someone corrects you.

Think about how you feel when people tell you you’re wrong. Especially when you’re taking a risk and aren’t quite sure of yourself. Especially if their correction involves an element of shame.

It’s hard to hear you’re wrong. It sometimes hurts to hear BUT would you want to continue doing it wrong? Your kids don’t either!

There are positive gentle ways to correct mistakes that don’t involve shaming them for not already knowing how to read! Responses that will encourage, not discourage, their efforts.

Growth Mindset Versus Fixed Mindset

Way before you start to read with your child, you need to start having conversations with them about growth versus fixed mind set. Okay, you’re not going to use those terms, but talk about how when anyone is learning any new skill, like reading or computers or whatever, they are going to make mistakes.

The important thing is to try again. That’s a growth mindset. If a child starts thinking they should already know how to do this then it will be easy for them to get stuck in a fixed I-Can’t-Do-This mindset. Agree on a way to let them know they need to try again.

Another way you can encourage a growth mindset is to praise your child’s efforts. Say, “You worked really hard on that!” Not just, “You are so smart!” Praising hard work lets your child know that it’s okay to fail and try again.

No one comes into this world knowing how to do everything. Your child does not have to be “perfect” (smart) to earn your praise.

Positive Responses You Can Use When Correcting Reading Errors

When your child does make a reading mistake, here are a few things you can say to soften the correction:

  • Oops, that one tricked you.
  • That was a little confusing. Do you want to try it again?
  • What clues can you find about that word that might help you?
  • Does the picture help you think about it?
  • What sound does the word start with?
  • Can you see smaller words or a word family that could help?
  • Are there other clues on the page (like pictures) that might help you predict what that word is?

When they do get things right, be sure to heap on a little praise! Say something like “Good job!” or “Thank you for working on that!”

Additional Considerations

There are a few more things you might need to consider with a young beginning reader. If any of these are an issue for your kiddo, you may feel as though you’re butting your head against a brick wall trying to get them to read.

Your child may feel that way too. You don’t want them to associate frustration, anxiety and dread with reading. Don’t hesitate to get help from a professional reading teacher if your child shows symptoms of any of these issues when approaching reading. Help is available!

  • Age – Before 6, kids have difficulty with some sounds like /l/, /s/ and /r/. Consonant blends like /th/ and /sh/. Your child will probably grow out of this one, but if a problem persists a speech therapist may be able to help.
  • Native language – If English isn’t the child’s “milk language” then they may have difficulty distinquishing between sounds in English and their other language. Lots of practice, actively listening for the troublesome sounds in words and possibly working with a speech therapist will help.
  • Vision – A child with vision problems isn’t going to be a successful reader without glasses! Opthalmologists are your friends for this one.
Child's book open to a cartoon cow and bird floating along in a yellow and red striped hot air balloon.  A pair of reading glasses is sitting on the book.

Physical Issues That Can Affect Reading

Problems like dyslexia, ADHD, diabetes and even common illnesses can affect a child’s ability to decode the written word and will require the assistance of a doctor, naturopath or therapist.

Seek professional help if you suspect one of these problems may be in-play. Your child’s school or pediatrician can get you started on the path to finding the right help!

Here are a few more reading resources that may help you and your child:

  • Important Early Literacy Terms That Every Parent Needs to Know
  • Tips for Helping Early Readers
  • Reading Assessments for Reading Success

PIN THIS FOR LATER

August 31, 2024 1 comment
0 FacebookTwitterPinterestPocketThreadsBlueskyEmail
Ghost Bingo printables
halloweenholidays

BOO! It’s Halloween GHOST Bingo!

by Teach Mama August 31, 2024
written by Teach Mama

Get ready to add a little spooky fun to your Halloween festivities with this Halloween GHOST Bingo game! Perfect for classroom parties, family gatherings, or just a fun at-home activity, this game is easy to set up and guaranteed to bring Halloween delight. Whether you’re a room parent planning a class party or a parent looking for a fun way to celebrate at home, this game (with free printables!) is sure to be a hit!

Ghost Bingo printable including a large printed card with a cartoon boy in a dinosaur costume, three bingo boards with colorful cartoon Halloween images and smaller printed cards with the same characters on each card.

Because we homeschooled we didn’t have the big class parties enjoyed in public school. So instead we did other fun things to enjoy the trick-or-treat season. Games like Halloween Ghost Bingo are a fun and quick way to create a little holiday break between subjects.

Halloween Ghost Bingo is Spooky Fun for Everyone!

Halloween Bingo is an easy game to fill those extra minutes here and there with a little bingo fun. Whether you use Halloween Ghost Bingo as a staple at Halloween parties, as a game center or as a quick activity to play at home with your kids it’s a great way to add some (not-too) spooky fun to the day.

Get Ready to Play GHOST Bingo:

Step 1: Gather Your Supplies

To play Halloween GHOST Bingo, you’ll need a few simple supplies:

  • Free Printable Halloween GHOST Bingo Boards (download below)
  • White Cardstock (for printing the boards and cards)
  • Scissors (to cut out the bingo cards)
  • A Container (like a mason jar or a plastic pumpkin to hold the picture cards)
  • Markers (you can use gems, candy, or any small items)

Step 2: Prep Your Container

For a fun and festive touch, store the bingo cards and markers in a decorated container. A mason jar filled with a bit of crinkle paper makes a cute and practical option. Or how about that big plastic Jack-o-Lantern you have in the back of the hall closet? Keep it! You can reuse this container year after year!

Step 3: Cut Out the Bingo Cards

Print your Halloween GHOST Bingo boards and picture cards onto white cardstock paper. If you want to make the game more durable, consider laminating the cards to protect them from sticky fingers. Once printed, cut out the bingo cards and add them to your container.

Ghost Bingo printable of a single bingo board with colorful cartoon Halloween images and smaller printed cards with the same characters on each card.

Let the Game Begin!

OPTION 1 – Pass the Jar

Pass the jar around and have each player draw a card and call out the image and the letter (G, H, O, S, or T). Players then check their boards to see if they have the image in the corresponding column. If they do, they can place a marker on that spot. Keep playing until someone fills a row and shouts “Bingo!”

OPTION 2 – Roll the Die

Yellow die with hand-drawn letters S and O on two visible sides with a ghost image drawn on the third visible side

Make one foam die spelling out G-H-O-S-T with one letter on each side. For the sixth side of the die draw a simple ghost figure. If the ghost side comes up on a roll, that is a “freebie” and a marker may be placed wherever the player wishes.

Normally I’d use one of my blank die, but for this game I “borrowed” a square foam block out of the huge bag of foam building blocks I keep in my counseling office instead.

OPTION 3 – Group Play

In a classroom or larger group setting, designate one person to draw the cards and call out the images and letters. Players take turns marking their boards as the game progresses.

To make it even more fun, you can give each player a blank card to fill out with their own custom Halloween images before the game starts!

Make It Extra Fun!

For a little added excitement, try using fun markers like candy corn, M&Ms, or even spooky stickers. At home, you can also use small toys or Halloween-themed trinkets. And don’t forget, if you land on the special “freebie” ghost, you can cover any spot on your board that matches the picture drawn!

Instead of shouting “Bingo” when they have all the pictures in a line covered have the kids shout “BOO” in their spookiest voice!

Download Your Free Halloween GHOST Bingo Game

In the download there are six different boards, each with a different header color, the G-H-O-S-T cards and picture cards to use during the game.

Something to use as markers. Buttons, pennies or flattened marble “gems” are good choices. M&M’s or candy corn also make great markers if you like the edible kind.

If you want to use this game in a classroom or at a party you can easily enlarge the picture cards so all the players can see more clearly what cards are chosen.

Print enough copies of the boards for everyone to have one and two or three copies of the picture cards that we’ll pull out of a plastic pumpkin during the game.

The big cards will help kids know what pictures to cover when we’re playing as a group.

Ghost Bingo printable including a large printed card with a cartoon boy in a dinosaur costume, three bingo boards with colorful cartoon Halloween images and smaller printed cards with the same characters on each card.

Get your GHOST Bingo on! Throw your email in the box below and your Ghost Bingo Printable will appear in your inbox as if by Halloween magic!

For More Spooky Halloween Fun, Check Out These Other Great Ideas:

  • Halloween Class Party Ideas – Help for Classroom Parents
  • Halloween Word Search
  • Halloween Joke Notes
  • Hats, Cats, and Pumpkins Grid Game
  • Halloween Learning Ideas

Happy, Happy Halloween!

PIN THIS FOR LATER

August 31, 2024 23 comments
0 FacebookTwitterPinterestPocketThreadsBlueskyEmail
Bunco printable score sheets
family funfamily life

How to Play Bunco: Super Fun GNO (Girls’ Night Out)

by Teach Mama August 31, 2024
written by Teach Mama

Need a break from the daily grind? Organize a Girls’ Night Out with a fun game of Bunco! It’s the perfect way to recharge, enjoy some self-care, and connect with friends. Discover how easy it is to set up a Bunco night that’s all about laughter, relaxation, and good company.

Bunco scoring sheet printable with wooden six sided dice

Being a parent can be a tiring job and it’s important to practice a little self-care so you have something to give back to your kiddos. If you’re an extrovert, then a Girl’s Night Out may be just what you need to recharge your batteries. (Different ideas for introverts! LOL!)

There are all kinds of ways to recharge with your friends and Bunco is a good choice. Bunco is the ultimate girls’ night out activity because it’s easy, it’s quick, and doesn’t require a lot of strategy. You can play and chat and not worry about using your brain all that much. And after a long day of dealing with the stresses of being MOM that’s just what the doctor ordered.

So maybe now is the time to gather some of your game playing friends together and start a Bunco group? Here’s how you start.

Small metal cup with red hearts on the outside with cash inside and a purple card sticking up with the ante instructions hand written

How to Start a Bunco Group

First Things First. You Need a Group!

Perhaps there’s already a Bunco group you can just plug into, but if not, it’s not that difficult to start one. Reach out to friends from your neighborhood, other mom groups, moms at the local summertime pool (and other extracurricular activities), book club (and other clubs and groups you belong to).

It’ll be a lot more fun if the group is diverse. It will also give everyone the opportunity to make some new friends.

I started a Google contacts group called ‘Bunco 2024’ to make sending emails easier. If folks responded, awesome! If not, I took it as a hint.

After we had our group, I started to gather supplies.

Bunco Supplies

  • Six-Sided Dice (you’ll need about twelve dice in total)
  • A Bell
  • Printable Score Sheets and Table Cards
  • Tables and Chairs
  • Pens or Pencils
  • Sometimes groups make players wear crazy hats or fun necklaces or hold silly stuffed things when they get a bunco

Throw your email in the box below to grab your printable score sheets and table cards (and a handy set of game instructions!)

You’ll need enough Score Sheets for each player and enough Table Cards for each table. The printables include enough for six tables. If you have a really big group, just print more and hand-write numbers on the cards. Or you may only need three or four tables.

Getting together to play Bunco is about the fun…not the fancy!

Bunco Night printables.  One page with rules.  Another page with score sheets and a third page with table cards

How to Play Bunco

  1. 12 players break into 3 tables of 4 players each.
  2. Tables are numbered; table 1 is the ‘head table’; table 2 is middle; table 3 is last.
  3. Players sit across from their ‘temporary team’ member at each table.
  4. One player at head table rings bell to signal start of game.
  5. Players at each table take turns rolling 3 dice, trying to roll the same number as the round     (example:  roll 1’s during the 1st round = points earned; 2’s during 2nd round, etc.).
  6. Players keep rolling until they score no points, after which time they hand the dice to the next player.  A table scorekeeper tallies points for both teams.
  7. When the head table earns 21 points, the bell is rung, and the round is over.
  8. Points are added.  Each table will have a winning team and a losing team. Players write their score on their personal score sheet and indicate win (W) or loss (L).
  9. Players either stay or move tables depending on whether they won or lost the round. Instructions are on the table cards.  ‘Temporary team’ members MUST switch after each game.

BUNCO = 3 of the same number rolled matches round number (example: three 2’s during 2nd round = BUNCO!  →  BUNCO = 21 points

Baby Bunco = 3 of same number rolled does not match round number (ex: three 2’s during the 4th round) = Baby Bunco  →  Baby Bunco = 5 points

Remember, the Fun Part About Bunco…is the Fun. But Prizes Don’t Hurt!

Everyone chips in $5 to play! And then, after all of the games are played, count the pot.

  • 50% of the total pot goes to the player with most Buncos
  • 30% of total pot goes to the player with the high score
  • 20% of the pot goes to the player with the most wins
  • $5 goes to the player with the lowest score
  • $5 goes to the player with the most losses

Don’t forget about the Bunco snacks! Check out how we do snacks for our  games:  Best Bunco Night Snacks

The great thing about Bunco is that it’s crazy easy and that you need very little brain power to make it work. It’s the ideal game to play while chatting with friends, catching up, and trying to solve world problems.

Here are some other great family game night ideas:

  • How to Play the James Bond Card Game
  • Minute to Win It. Games for Kids and Families
  • New Year’s Eve Bingo Bonanza

PIN THIS FOR LATER

August 31, 2024 8 comments
0 FacebookTwitterPinterestPocketThreadsBlueskyEmail
Two boys and a girl wearing blue tee shirts standing a field of Indian Paintbrush wildflowers
family lifetravel

How to Make the Most of a Day Trip With Your Child

by Teach Mama August 28, 2024
written by Teach Mama

Making a family day trip to a museum, farm, or anywhere can create a day that is both both fun and educational for your child. With a little preparation, you can turn these outings into fun AND enriching experiences that spark curiosity and create lasting memories. Whether you’re visiting a local farm, exploring a museum, or enjoying the thrills of an amusement park, these tips will help you make the most of your day.

Vertical Assembly Building at Kennedy Space Center with a large American flag and the NASA meatball log on the side of the building

One of my favorite trips with our kids included a stop at the Civil War battlefield in Vicksburg, MS. We arrived at dusk just before the park closed. The engineer-husband had read up on the battle before the trip and narrated as we drove through misty near-dark. Complete with sound effects.

Our kids loved it. They still talk about that stop and how they felt like they had actually witnessed the fight! All because of a little preparation.

Getting Ready for Your Trip

Before you set a foot in the car, there’s a lot you can do to prepare your child for the adventure ahead. This builds excitement and lays the groundwork for the learning opportunities that will unfold throughout the day.

Do Pre-Trip Research

Start by researching the location you’ll be visiting. Many farms, museums, and amusement parks have websites with sections specifically designed for young visitors. These often include maps, photos, and educational resources that can help familiarize your child with what they’ll see.

Talking about what they already know about the topic can activate their prior knowledge, making it easier for them to connect what they learn on the trip to what they already know.

Use Travel Time Wisely

The journey to your destination is a great time to start the learning process. Engage your child with traditional travel games like Travel Bingo or using street signs to encourage reading and math skills. These activities turn what could be boring travel time into an opportunity for fun and education.

Making the Most of the Trip: Engaging During the Visit

Once you’ve arrived at your destination, it’s easy for everyone to get caught up in the excitement. However, taking a little time to focus on the educational aspects of the trip can enhance your child’s experience and help them appreciate the day even more.

Ask for Information and Resources

As soon as you arrive, ask for brochures, maps, or any free resources available for families. These can serve as a guide for your day, helping you navigate the site while also providing educational content that you can discuss with your child. Many locations offer family-friendly materials that are perfect for learning on the go.

Attend On-Site Events

If the location offers demonstrations, shows, or hands-on activities, be sure to attend them! These experiences engage multiple senses, making it easier for your child to remember what they’ve learned.

Two boys and a girl wearing blue tee shirts standing a field of Indian Paintbrush wildflowers

Whether it’s a farm demonstration on how animals are cared for or a museum workshop on art techniques, these events are golden opportunities for learning.

Encourage Observation and Curiosity

Take time to point out interesting sights that your child might not notice on their own. Whether it’s the intricate details of a building, the vibrant colors of a peacock’s feathers, or the sheer size of an exhibit, these observations can turn ordinary moments into awe-inspiring ones.

Engage your child’s strengths—if they love math, for example, count the number of exhibits or animals together. If they’re into science, relate what you see to experiments you’ve done at home.

Read the Signs!

Encourage your child to read the signs, labels, and descriptions around the area. This not only helps improve their reading skills but also deepens their understanding of the exhibits or attractions. It’s a great way to integrate literacy into your day without it feeling like a chore.

Reflect on the Day: Post-Trip Activities

The learning and fun don’t have to end when you leave the site. Continuing the conversation and reflecting on your experiences can reinforce what your child learned and help them retain that knowledge.

Create Day Trip Art

Childs hand making artwork with a drawing of a dinosaur on the right side and the word "bones" in cut-out letters along the left side all in a gold frame

One of the best ways to wrap up the day’s adventure is by encouraging your child to create art based on what they experienced. Sit down together and brainstorm the highlights of the trip. What did they love? What was surprising?

Then, let them express those thoughts through drawing, painting, or crafting. With a few stickers and drawings, even the simplest artwork can become a treasured memory of the day.

Discuss and Reflect

Talk about what you all loved—and didn’t love—about the trip. These discussions can help your child process the experience and articulate their thoughts and feelings. It’s also a great way to bond as a family and create lasting memories together.

Additional Tips for a Successful Family Day Trip

To make sure your family day trip goes off without a hitch, here are a few extra tips:

Pack Snacks and Water – Even if you plan to eat on-site, bringing extra snacks and water can keep everyone energized and hydrated, especially if the day involves a lot of walking or outdoor activities.

Capture the Moments – Take photos throughout the day to capture special moments. These can be great for post-trip reflections or just as a keepsake of your adventure.

Stay Flexible – Sometimes things don’t go according to plan, and that’s okay. Being flexible and going with the flow can turn unexpected changes into new adventures.

Child wearing a tee shirt with a printed pumpkin standing on a train car

Hidden Treasures – Don’t overlook hidden treasures you may find along the way. Stop when something looks fun and interesting. We passed a fair at a State Park in Alabama and decided to stop even though we had a long way to go.

Turns out it was a historical site complete with panning for gold, bluegrass music and lots of fun! We got to our hotel at about two o’clock in the morning but it was another stop the kids still talk about.

More Great Resources for You and Your Child:

  • Raising Kids Who Love Math
  • Fun with Rockets
  • Raising Kids Who Love Science
  • Is My Child Gifted?

PIN THIS FOR LATER

August 28, 2024 0 comments
0 FacebookTwitterPinterestPocketThreadsBlueskyEmail
Child's hand writing words on a grid sheet
family lifeschool

How to Prepare Your Child for Kindergarten

by Teach Mama August 23, 2024
written by Teach Mama

In a few short weeks your little one starts Kindergarten! Make sure they have a good start on readiness with these end of summer activities and tips.

Collage of images.  Lilac backpack with a cloth flower.  A child's hand gluing shapes to a grid board.  Black spiral notebook with a name tag on the front cover.  A child tying laces.

When I taught Pre-K I was amazed at the difference just knowing a few simple things made in how well kids did that year. Of course Pre-K and Kindergarten are all about getting everyone up to speed, but it is so much easier on them if they can come to that first day of school already being familiar with some of the basic skills.

How to Prepare Your Child for Kindergarten This Summer

Most kids are already pumped about starting school, maybe a little apprehensive too, but still mostly excited. So even if you haven’t done a lot up to this point, tap into that excitement to get them ready. It isn’t too late to start … Right Now!

Black spiral notebook with a name tag on front

The Everyday Name books are just one way we celebrate–and practice!–names around here.

Practice Name Writing

Kids should be able to write their names by the time they get to kindergarten. Really. Kids are 5 or 6 by the time they hit elementary school, and many have been in preschool or daycare for a year or two before that.  That’s a lot of time for practicing the few letters that make up a child’s name.

The writing doesn’t have to be perfect, but it should be legible (with legible being liberally sprinkled with grace!) Most likely on day one, kiddos are going to be asked to write their names, and what a confidence boost for a nervous child if he’s able to do it!

Do this by: Starting an Everyday Name Book; playing with names, playing with family names; finding any and every excuse to write names!  Practicing and practicing and playing games with family names.

Talk about Letters–identify them and know their sounds.

This is more than just knowing the alphabet song! One of my students could sing the song but heard LM as one letter which of course threw everything after that off. There are tons of ways of playing with the letters of the alphabet, and by kindergarten, children should be able to identify most–if not all–of both uppercase and lowercase letters, in and out of order.

Of course, they’ll learn all about letters throughout the kindergarten year, but it’s important to make sure that children are able to identify of most of the letters so that they can focus on learning the sounds they make. Often this is the more tricky part.  But we can help them learn letters and we can do it in really fun, sneaky ways.

Do this by: Checking out doing ABC Hunts; playing clothespin games with letters; putting letters on lids, play alphabingo; playing some alphabet board games; exercising with ABC’s; going on a leafy backyard alphabet hunt; doing an on-the-road (or at the grocery store or anywhere) alphabet hunt.

Child's hand writing words on a grid sheet

WORDO! is a super-awesome game for playing with words, reading and writing.

Play with Sight Words

Many school districts suggest that parents even start some sight word practice with their rising kindergartners before school starts. I think that’s a really great idea. Most children know that when they go to kindergarten they’ll learn to read.

And learning sight words–the words that are best learned by memorizing because they need to be recognized quickly and automatically (and because many don’t follow phonics rules!)–can be a confidence booster just like learning how to write names can be.

But the days of standing in front of a child flipping flashcards and making them read them for you are over. There are a ton of cool ways that kids can start practicing–and learning–these words that trump the ole ‘drill-and-kill’ methods.

Do this by:  Playing Words Three Ways; taking out the magnetic letters and using them for building sight words; using sight-word word searches; writing sticky finger words; playing sight word Go Fish! or Memory; playing WORDO!; or check out a ton of other cool ways to play with sight words.

number chart 3

Number Boxes are a great way for kids to connect numerals with quantities.

Play with Numbers

Do a lot of number-playing this summer, in card games, in street sign games, and in simple “how many are there” addition games as you go about your day. It’s fun for them and they are learning math basics without even knowing it! It’s really important for our kids to be exposed to math concepts and have a general number sense before kindergarten.

Counting during walks, lining up Lego guys and counting them as you add them to the bridge you just built, or something as simple as timing how quickly ice-cubes melt in the sunshine all help build a solid mathematics foundation in our kiddos.

Do this by: Including math in your everyday activities or newspaper reading; counting money and skip counting; playing with numbers and number words; pulling out the ole grid games; reading some math-poetry; playing with number boxes.  Creating fun ways of remembering how to write number 5.

Weather page in a newspaper

Read, Read, READ!

We really cannot read too much to our kids. We can’t. Reading can–and should–be done throughout the day, in a number of ways and not just reserved for before bedtime when everyone’s beat and you can hardly keep your eyes open.

We–as parents–need to show our kiddos that we don’t only read our friends’ and family members’ Facebook updates; it’s our job to demonstrate to kiddos that we read instructions so we can put together that bookshelf from Ikea, we read the newspaper so we know what’s going on in the world, and we read recipes so we know how to make our favorites.

And probably most importantly–we need to show our kids that we read for pleasure. We read to relax, we read for enjoyment.

We want them to get psyched for kindergarten and learning to read because then. . . then the world is open to them and they can learn about anything and everything they want!

Do this by: Reading, reading, reading. Reading about back to school. Reading to learn about our world. Reading street signs, reading cereal boxes, reading the words on their Wii games. Making reading fun. Talking about words and celebrating words.  Throwing in easy, natural reading strategies during read-alouds.

Hands tying laces on a shoe box wrapped in red and blue striped paper

The Shoelace Box–or Ribbon Rows–no matter what you call it, it works.

Tie Shoes (Zippers and Buttons too)

Yep. Kids should start learning how to tie shoes, zip zippers, and button buttons. Though most are wearing flip-flops or crocs right about now, they’ll be wearing sneakers soon–and they’ll feel great if they can tie them for themselves instead of having to get the teacher to help.

Tying shoe is a hard one for lots of kids. Parents often are guilty of putting off teaching this skill because, let’s face it, sometimes when you’re in a hurry it’s just easier to do it for them. But now’s the time! With a lot of practice (and some fun) your little one will know how to tie his shoes on his own. There are several “stories” and rhymes to help them remember the steps.

Do this by: Making a shoelace box.  This makes a game out of the whole thing and takes a lot of the pressure off. When it comes to zippering or buttoning, have your child practice by zippering or buttoning the sweatshirt that you’re wearing so she sees how it works more clearly than when she tries to zipper or button the one wearing the sweatshirt herself.  Yours is bigger, too, so that sometimes helps.

me on the map

Me on the Map may help kiddos learn their stats.

Memorize Their Info–Full Name, Phone Number, and Address

Kids should know this stuff by elementary school.  If they don’t know their whole name–first, middle, and last–then start on that pronto! They don’t need to spell the whole thing (that would be nice . . . ) but your child needs to know that he’s Travis J, or Travis Johnson, not to be confused with Travis K, Travis O, or Travis W.

Okay, so the phone number and address are a little more difficult, and admittedly, I’m not sure our kids knew ours by kindergarten age. Looking back I seriously regret not making it a priority. Fortunately they were never caught in a situation when it was critical! Be smarter than me and do this NOW!

Do this by: A good friend of mine taught her girls to memorize their phone number with this song, set to the tune of
Frere Jacques (Are you sleeping, are you sleeping? Brother John. . . ):

1-2-3, [Insert your own phone number for these–]

1-2-3,

4-5-6.

4-5-6.

7-8-9-10,

7-8-9-10,

Call any time.

Call any time.

The address? Me on the Map activity is a good activity to teach them where in the world they are, but they still need to memorize their actual street address with zip code. When you go out on walks you can also play Where is Home? to get them thinking about how they would get home from different starting points.

Lilac backpack with red cloth flower

Talk About Safety

Stranger Danger used to be the way we taught this, but today we know that it is better and safer to teach about Safe Strangers. I really hate that this has to be taught, but it does. Over and over and over.

Your child needs to know there are certain strangers they can pretty confidently turn to if they are in trouble and you aren’t there. Uniformed officers, security officers, store employees, other parents with children are all motivated to help children.

Your child also needs to have your full name memorized, especially in this day when often mommy and daddy may have a different last name than their child.

Do this by: Read or listen to Spotting Danger Before it Spots Your Kids by Gary Quesenberry and go through it with your children! The Safeside: Stranger Safety DVD gets good reviews and is aimed towards kids.

Eat Lunch out of a Lunchbox

Many kids do this at preschool before they hit the big K-year. Because our kids were homeschooled they never had lunchboxes. I didn’t know this was a thing for them until our daughter started sending her son over to our house with a lunchbox because she didn’t want him to miss out! Who knew it was that important?

So in case your child hasn’t had this experience either, you might want to pack up the new lunchbox like you will during school and have a picnic or two before the big day.

Do this by: Packing his lunch in his brand-new, just-for-kindergarten lunchbox and picnicking somewhere!

Blue backpack with a shrinky-dink tag on the zipper pull

Bling the Backpack

By this time I think we all know it’s not wise to get backpacks monogrammed with kid’s names because it makes it easier for a stranger to call our kids by name and lure them away from safety. Right? Yes, you do need to have their name on the backpack, but put it inside.

I hear from my public school friends that it is important and trendy to bling out backpacks. Now some kids are going to want BLING while others not so much. Be sensitive to the level of bling your child is comfortable with.

Do this by:  Making something simple and fancilicioius, like these felt flower pins or make it a little more subdued. You can make personalized Shrinky Dinks charms showcasing what your child is interested in, but there again just be careful how much information you put out there for everyone to see.

Say ‘Hello’ to her teacher

The kids really love filling out and sending these notes — and I think the teacchers like them too.

It’s just a quick introduction–nothing fancy or involved–between student and teacher before Open House, Back-to-School picnic, whatever. Some schools have actually adopted a version of these letters and send them to the kids. You might want to check out what your school does so the effort isn’t duplicated.

Do this by: Sending Hello Teacher Notes to the new teacher. 

kindergarten prep

Let them play, let them play, let them play. With new friends and old.

Get Together with New Friends and Classmates

It’s so important for kids to have at least one familiar face when they walk into the building that first day, but I am well aware that that is not always possible. 

Do this by:  Ask if it is possible to get contact information for the parents of the children in the class so you can organize a prestart playdate. Another option is to work through the parent organization (PTA or whatever it is called in your school).

Send out emails inviting everyone to a park playdate event. Something along the lines of: Let’s get the Bayside Elementary School 2024 rising kindergartners together!  Plan to meet at [this park] on [this date] at [this time].  Bring snacks! Bring outside toys! Siblings welcome!!  Any questions, please contact [your email or phone number].

And be sure to stop by the grocery store for some cheap frozen pops if you can.

Dandelions in a field

Following Directions

Having kids listen to verbal directions–and then follow them–is super-important for success in school and life! There are probably a zillion ideas for how to get kids to listen. If you have a foolproof method, drop me an email! As far as I can tell the ideas are divided into two camps, Intrinsic and Extrinsic rewards.

Extrinsic rewards

Those are the rewards that are outside the child. Gem Jars, flowers on a poster, checks or little gold stars etc. These work great … as long as the reward is offered. It’s been shown in several studies that when the reward stops the behavior actually decreases. Rats!

Intrinsic rewards

These are the rewards that come from inside the person. As you can figure, they are more difficult to set up but last much longer. It’s the difference between getting that star and the feeling a child gets from within for doing a good deed. Those behaviors last a long time, sometimes a lifetime! Sometimes all it takes is a sincere word from Mom or Dad noticing the behavior.

Whichever way you choose it’s very important to give kids specific tasks with clear directions so they practice those listening skills. 

Start with small tasks. That way it’s not always a ‘Get in there and clean your room‘ (A BIG job with lots of variables), ‘Hang up those wet towels!’ or a ‘Please turn off the light‘– maybe if we occasionally throw in a ‘Please make yourself–and me–a huge bowl of ice cream‘ or a ‘Will you please teach me how to play Mario Kart?‘ they’ll listen more closely. . .

Remember to say, “Thank you for listening and following directions so well!” so they can connect the behavior to the reward.

Give Them Space

It’s sometimes difficult for parents to do, but giving your child free time is important. I’m not talking about setting our kids free to roam the ‘hood with the instructions to return at dinnertime. Sadly, those days are long gone.

I’m talking about giving kids the opportunity and freedom to choose for themselves what they do and, to a much lesser degree, where they do it. As long as you know they are within safe boundaries of your house, possibly your yard, or their treehouse/playhouse/fort then let them be.

They need the limited practice of making those decisions without feeling they are always under your watchful eye. (Even though, in truth, you’ll still probably be watching from a distance!)

Kindergarten is a big step.  And our kids need to know that we have confidence in their success.

Four leaf clover in a field of grass

Relax!

I recently read an article entitled How to Land Your Kid in Therapy. As a counselor I often hear parents fret about their kids “needing therapy” as if it were an indication of their failure as parents. I always ask if they feel the same way when their child get a cold.

Really y’all, everyone needs a little help at times … even your kiddos! And there is no such thing as a “perfect parent”. Relax! Focus instead on being a good enough parent. Do your best. Ask for forgiveness when you fail and be sure to give it when they fail. Then get back up and try again!

PIN THIS FOR LATER

August 23, 2024 0 comments
0 FacebookTwitterPinterestPocketThreadsBlueskyEmail
collage image of various minute to win it games being played by the whole family
family funfamily lifeindoor activities

Minute to Win It Games for Kids and Families

by Teach Mama August 23, 2024
written by Teach Mama

Sometimes you just want a little fun whether it’s you and one kid or the whole neighborhood. Here are twelve of the best games we’ve found with a handy printable set of instructions and score sheet. Enjoy!

collage image of various minute to win it games being played by the whole family

We’ve researched, analyzed, and experimented with these games, and out of them all, here are our favorites, complete with a few notes to ensure a successful game time.

You can totally adjust these games for whatever age group you have or however many players you have. You can adjust them for how competitive you want to be or how team–or individual–focused you want to be.

Minute to Win It Games for Kids and Families

Prepare for the Games

Before you begin, gather all of your supplies (way down below!) and write the Minute to Win It Games you are playing on a poster board. The poster board brings out the competitor in all of us when everyone can see how you are stacking up!

Poster board score sheet with the player's names across the top and the  games listed along the left side

You can also download a handy printable score sheet along with instructions for all of the games below. Keep going. You’re almost to the really fun part!

Score sheet grid with players' names across the top and games along the left-hand side

Choose Teams

We wrote down each player’s name on a small piece of paper, and before each game, we drew names to pick partners for that game. That way, teams were mixed up a bit and teams weren’t stuck. It made the games much more fun.

Because we started with ten people and planned to pick partners for each game, we decided to score our games as follows:

  • winners: each got 5 points
  • 2nd place: 4 points
  • 3rd place: 3 points
  • 4th place: 2 points
  • 5th place: 1 point

It worked out well. We also didn’t get through all twelve games in one night. We moved slowly though each with our main focus: fun.

LET THE GAMES BEGIN!

We cheered, hooted, and hollered.

We took a break for halftime and the kids played for a bit and the parents re-grouped. It takes a lot out of you, setting each game up, playing, and keeping the atmosphere light.

1. Kix Chopstick Race

Kix cereal in a bowl with a pair of chopsticks

Players work individually to move as many Kix cereal pieces from a central bowl into their own plastic cups, using only a pair of chopsticks.

Easy? Think again!

Kids around a table moving Kix cereal from a bowl into cups with chopsticks

2.  Cookie Face

Players have a cookie on their foreheads and have one minute to move that cookie from their forehead and into their mouth.

The winner is the player who moves the most cookies from forehead to mouth in one minute’s time!

Boy with a Nilla wafer on his forehead

3. One-Hand Bracelets

Hand holding a pipe cleaner with fruit loops strung on it

One minute to thread as many fruit loops onto a pipe cleaner as possible.

And then–here’s the clincher–the player has to make that pipe cleaner into a bracelet. Using only one hand.  So funny!

Children around a table stringing fruit loops onto pipe cleaners with one hand

4. Penny Towers

Hand picking pennies up from a stack

Players have one minute to stack as many pennies with one hand as they can. It’s harder than you may think!

The winner is the person who has the highest stack after one minute.

Children around a table stacking pennies

5. Marshmallow Toss

Adults and children standing in lines facing each other in a kitchen

Players partner up and stand across from each other, about 2-4 feet apart.

One person has a handful of marshmallows and the other has a small paper cup. Players have one minute to toss as many marshmallows into the cup as possible.

After one minute, the throwers catch and the catchers throw.

The winning team is the one with the most marshmallows in the cup!

Pro tip: You can use jelly beans, chocolate chips or anything else small for this game. Let your imagination run wild!

Adults and children standing in lines facing each other in a kitchen.  Marshmallows are all over the floor.

6. Marshmallow Race

Girl and man racing to blow a marshmallow across a table with a straw

Simple. You can play this several ways:

  • Break the group in half and draw a line in the middle of the table. Each side uses inexpensive plastic straws to try to blow the marshmallows to the other side of the line. The team with the most after one minute wins.
  • Each person plays individually and has one minute to blow a single marshmallow from one side of the table to the other. The person with the most over the finish line at the end wins.
Girl and bow racing to blow marshmallows across a table with a straw

Straws and marshmallows, and a clean table–that’s all you need.

7. Stack Attack

Two girls stacking blue solo cups into a pyramid on a wooden table

Players have 1 minute to completely stack 36 cups into a pyramid and unstack them back into a sleeve. So fun!

Man and woman stacking blue solo cups into a pyramid on a wooden table

8.  Movin’ Blue

Blue and red solo cups

First, you make a stack of twenty-four red cups and one blue cup at the top. Players have 1 minute to move through the entire line of cups moving the blue cup from the top to bottom.

Sounds easy…but can YOU do it?

Give it a try!

9. Nut Stacker

Steel hex nuts threaded onto a wooden skewer

Thread 5 nuts onto a wooden chopstick. With one hand, remove the nuts from the chopstick one at a time and stack all the nuts on top of each other on the table.

You’ll be amazed at how slippery those little nuts become when you are in a hurry!

10. Junk in the Trunk

Ziplock baggie box with a cloth strap and two ping pong balls

Players have an empty sandwich bag box (or tissue box) tied to their waist with 6 ping pong balls inside. Players move shake and shimmy to get all balls out of the box in under one minute.

This. Is. Hilarious. You never knew you could move like that!

Two girls with a Ziplock baggie box held onto their back by a cloth strap working to bounce ping pong balls onto the floor

11. Balance the Balls

Ping pong balls in blue plastic baskets

Players move ping pong balls from one shared bowl to another bowl on the opposite side of the room.

The catch: players can only move balls using a spoon that they’re holding in their mouth.

OR, you play with just about anything you have on hand!

Ready! Set! Go!

Colorful plastic bugs in a blue plastic basket and a clear plastic spoon

12. Sticky Balls

Blue and clear glass balls on a table with a strip of double-side tape

Players roll marbles from one side of the table to the other, trying to get as many as possible to stick on double sided tape.

Really, it was so much fun.

Prizes!

Children opening wrapped prizes around a wooden table

Just like we do for our New Year’s Bingo Bonanza, we wrap whatever we have around the house–so some are fun prizes and some are pure funny prizes.

And any complainers lose their prize. It’s all about the fun, right?

Throw your email into the box below and the Minute-To-Win-It game instructions and score sheet printable are yours!

Supplies Needed

  • Kix cereal (or another round cereal)
  • Chopsticks (3 pair)
  • Pipe cleaners/ chenille craft sticks
  • Fruit Loop cereal (or another loop cereal)
  • Pennies (about 300)
  • Small marshmallows (or jellybeans or chocolate chips)
  • Small Dixie cups
  • Plastic straws (about a dozen)
  • Red solo cups (about 100)
  • Blue solo cups (10)
  • Wooden skewers
  • Large nuts (hardware—about 15-20)
  • Ping pong balls (about 40)
  • 3 square tissue boxes or sandwich bag boxes, empty with long ribbon (about 36″) around it
  • Nila wafers (or other small cookie)
  • Plastic spoons (10)
  • Plastic bowls (6)
  • Marbles (30)
  • Double-sided tape
  • Poster board (for keeping score)
  • Funny prizes for winners – maybe a plastic crown or tiara?

Want a few more fun ideas to use with your kids and family?

Check these out:

  • Musical Leaves a Fun Indoor Fall Activity
  • New Year’s Bingo Bonanza
  • Valentine’s Day Class Party
  • Throw a Rockstar Valentine’s Day Class Party
  • Halloween Class Party Ideas
  • New Year’s Eve Fondue for Family

PIN THIS FOR LATER

August 23, 2024 25 comments
0 FacebookTwitterPinterestPocketThreadsBlueskyEmail
Best Of Teach Mamahalloweenholidays

Halloween Party Ideas: Help for Classroom Parents

by Teach Mama August 20, 2024
written by Teach Mama

It’s almost Halloween time, which means that all around the world, Classroom Parents will soon be scrambling about hither and yon in search of Halloween party ideas. You can find yours right here!

Dark blue witch's hat with a purple ribbon hat band

Boogers on a Stick

Halloween Class Party Note to Parents

Our Halloween Party letter

Pretzel sticks with green icing on one end

Help for Classroom Parents–the Halloween Party:

There’s no need to reinvent the wheel and the Halloween party has been done in many forms for years and years and years.

But we can all stand to have some cool ‘new’ ideas each year so that our kids don’t get too bored, right?

The first thing to do is send a letter home with all of the kids in your child’s class–something that looks like this class parent note. 

Feel free to download and adjust as necessary.   I asked that his teacher email the document to the parents, and I sent a hard copy with the kids as well.

Draft letter with four jack-o-lanterns across the top with details about an upcoming Halloween Class Party

Grab your copy of the Halloween Class Party Parent Letter Form, in DOC format, here:

Most public schools I know anything about have a pretty good idea already of what they expect to happen on party day. Some schools have a Halloween Parade while others may have the kids dress up as their favorite book character instead of all the scary costumes.

I think most schools schedule the actual parties so they end right when school is out. You need to check with your teacher to find out if there are other expectations, restrictions or considerations you need to be aware of.

Parade

The school does a parade, and all students participate. We helped them get dressed, then we shuffled them O-U-T to the parade starting point.

Snacks

You can really have a blast with this part.  Be creative! Go wild and bay at the moon in best werewolf style. Seriously. Spooky snacks are THE best. Aren’t feeling it? Don’t worry a second about it. Because store-bought cupcakes and cookies are really great, too.

The kids don’t care. They’ll be overloaded with candy after Trick-or-Treating anyway.  But for this classroom party, we had cupcakes, juice boxes and water, and some special Halloween treats.

Pretzel Sticks with Green Icing on one end arranged on a black plate

Boogers on sticks (cheese-wiz with green food coloring). . .

Faux bloodshot eyeballs made from small powdered donuts, lifesavers, a chocolate chip and red gell icing

 . . . ‘eyeballs’ (small powdered donut with gummy LifeSaver in the middle and a chocolate chip in the center) dripping with blood (gel icing). . .

Carrot "fingers" with almond fingernails arranged on a cookie sheet

. . . and ‘fingers’ — carrot sticks with almond slivers as nails (glued on with cream cheese)

Carrot stick "fingers" arranged on black plates and in bowls with cream cheese

made the kids totally creep out at the party.

Quick Party Games

  • Estimation Game: While the kids ate their snacks, you can play a little estimating game with candy corn and spiders. The halloween party estimate game 2024 can be downloaded here, and all you need is a jar of candy corn and a jar of spiders!
One jar filled with candy corn and another filled with plastic spiders for estimating quantities

The Estimation Game kept kids focused–and thinking!–during Spooky Snacks!

Mummy Wrap: 

All you need are two (or more) teams of about 4-5 kids each, and a few rolls of toilet paper.  Each team picks one ‘mummy’ and the team works to wrap him (or her) up!  The teacher is the judge, and the best lookin’ mummy wins! (have some little prize ready)

Hot Pumpkin:

Like hot potato, hot pumpkin requires a small, silly pumpkin or gourd, some crazy Halloween music, and kids sitting in a circle.  They pass the hot pumpkin around until the music stops, and whomever is caught holding it is out of the circle. The winner is the last person without the pumpkin!  *For more excitement, and to keep the kids engaged longer, 2 or 3 you can have two or three circles going at the same time

Craft:

Keeping it simple is the key here–so we bought a kit from the craft store, and the kids used Foamie stickers to decorate pumpkins and ghosts. Each child had his own set of supplies already separated into a sandwich bag so it was easy to hand out crafts and everyone gets exactly the same thing (no fighting over supplies!) Have examples of the finished crafts on every cluster of tables.

Bingo:

Bingo is a great end-of-party game, because it can be played over and over as needed, filling in space or skipping if you run out of time.  You can use this Halloween GHOST! Bingo Board if you’d like. Bingo away!

Boo bingo boards with ghosts, cupcake and other Halloween images with a yellow die

Need some more? I have a whole other party planned for you here:   (And that’s not a Halloween joke)

Want a few more fun halloween party ideas?

  • Halloween Class Party
  • More Halloween Class Party Ideas
  • GHOST Bingo!
  • Spider Web Craft
  • Pumpkin Match 
  • Halloween Word Search
  • Halloween Ghost Cookies
  • Boo! Your Neighbors
  • Alternatives to Halloween Candy
  • Halloween Joke Notes
  • Halloween Learning
  • Hats, Cats, and Pumpkins Grid Game
  • Cool Halloween Costumes for Kids
  • Candy Experiments

PIN THIS FOR LATER

August 20, 2024 25 comments
0 FacebookTwitterPinterestPocketThreadsBlueskyEmail
Newer Posts
Older Posts

About Me

About Me

I love to cook, create delicious recipes with beautiful photos. I also share my life stories and my relationship with food.

Follow Me

Recent Posts

  • Sight Word Game: Go Fish!

    June 20, 2025
  • Write a Shape Book with your Pre-Reader

    June 20, 2025
  • Every Day Summer Math Activities

    May 16, 2025
  • Quick Father’s Day Surprise Love Notes

    May 16, 2025
  • Sneaky Summer Reading Challenge

    May 16, 2025

Categories

  • activating schema (1)
  • Activities (11)
  • alphabet (9)
  • animals (2)
  • april fool's day (8)
  • beginning sounds (2)
  • behavior management (4)
  • Best Of Teach Mama (22)
  • birthdays (1)
  • books (7)
  • Breakfast (6)
  • christmas (18)
  • colors (3)
  • comprehension (18)
  • computation (11)
  • computer time (2)
  • concepts of print (1)
  • connecting (5)
  • cooking (3)
  • counting (8)
  • crafts (18)
  • creative writing (4)
  • critical thinking (5)
  • digital literacy (4)
  • early literacy (24)
  • easter (9)
  • environmental print (3)
  • family fun (34)
  • family life (81)
  • father's day (2)
  • featured (4)
  • Featured (5)
  • fine arts (2)
  • fluency (2)
  • foundations (9)
  • giving back (2)
  • god & goodness (1)
  • grammar (1)
  • halloween (21)
  • holidays (110)
  • independent reading (2)
  • indoor activities (20)
  • inferring (2)
  • informative writing (3)
  • july 4th (3)
  • listening (2)
  • lunchbox love notes (12)
  • Main Dishes (6)
  • math (31)
  • Mental Health (5)
  • mother's day (3)
  • new year's (6)
  • non-fiction (2)
  • Noodles (6)
  • numbers (8)
  • organization (2)
  • outdoor activities (10)
  • outdoor learning (4)
  • parenting (31)
  • phonological awareness (2)
  • plants (3)
  • predicting (1)
  • pretend play (2)
  • printables (29)
  • questioning (3)
  • quick trick (2)
  • read-aloud learning (2)
  • reading (76)
  • retelling / summarizing (1)
  • rhyming (3)
  • school (19)
  • science (24)
  • science experiments for kids (14)
  • sight words (8)
  • smart deals for family (1)
  • sorting (3)
  • speaking (2)
  • spelling (3)
  • st. patrick's day (10)
  • Stargazing (1)
  • STEM (4)
  • teacher appreciation (7)
  • teaching (1)
  • thanksgiving (6)
  • travel (9)
  • tripod grip (3)
  • Uncategorized (2)
  • valentine's day (20)
  • Vegetarians (6)
  • visualizing (1)
  • vocabulary (4)
  • word building (2)
  • word consciousness (9)
  • writing (16)

Hi! I'm Patricia.

nice to meet you!

My family currently lives in Central Texas. A few of my favorite things include baking, teaching, and working with children.

Learn More

About Me

I love to cook, create delicious recipes with beautiful photos. I also share my life stories and my relationship with food.

Phone: (012) 345 6789
Email: pencidesign@gmail.com

Sign Up for Email Updates!

Follow Us

  • Facebook
  • Pinterest
  • Instagram

Breakfast Recipes

  • Sight Word Game: Go Fish!

    June 20, 2025
  • Kindergarten Summer Reading Readiness

    April 23, 2025

Recent Posts

  • Sight Word Game: Go Fish!

    June 20, 2025
  • Write a Shape Book with your Pre-Reader

    June 20, 2025
  • Facebook
  • Twitter
  • Instagram
  • Pinterest
  • Tiktok
Teach Mama
  • Home
  • Recipes
  • Categories
  • About
  • Contact
  • Home 1
  • Home 2
  • Home 3
  • Main Dishes
  • Noodles
  • Breakfast
  • Vegetarians

Shopping Cart

Close

No products in the cart.

Close